Category Archives: Vegetables

Ladybug Caprese Bites

Ladybug - finished

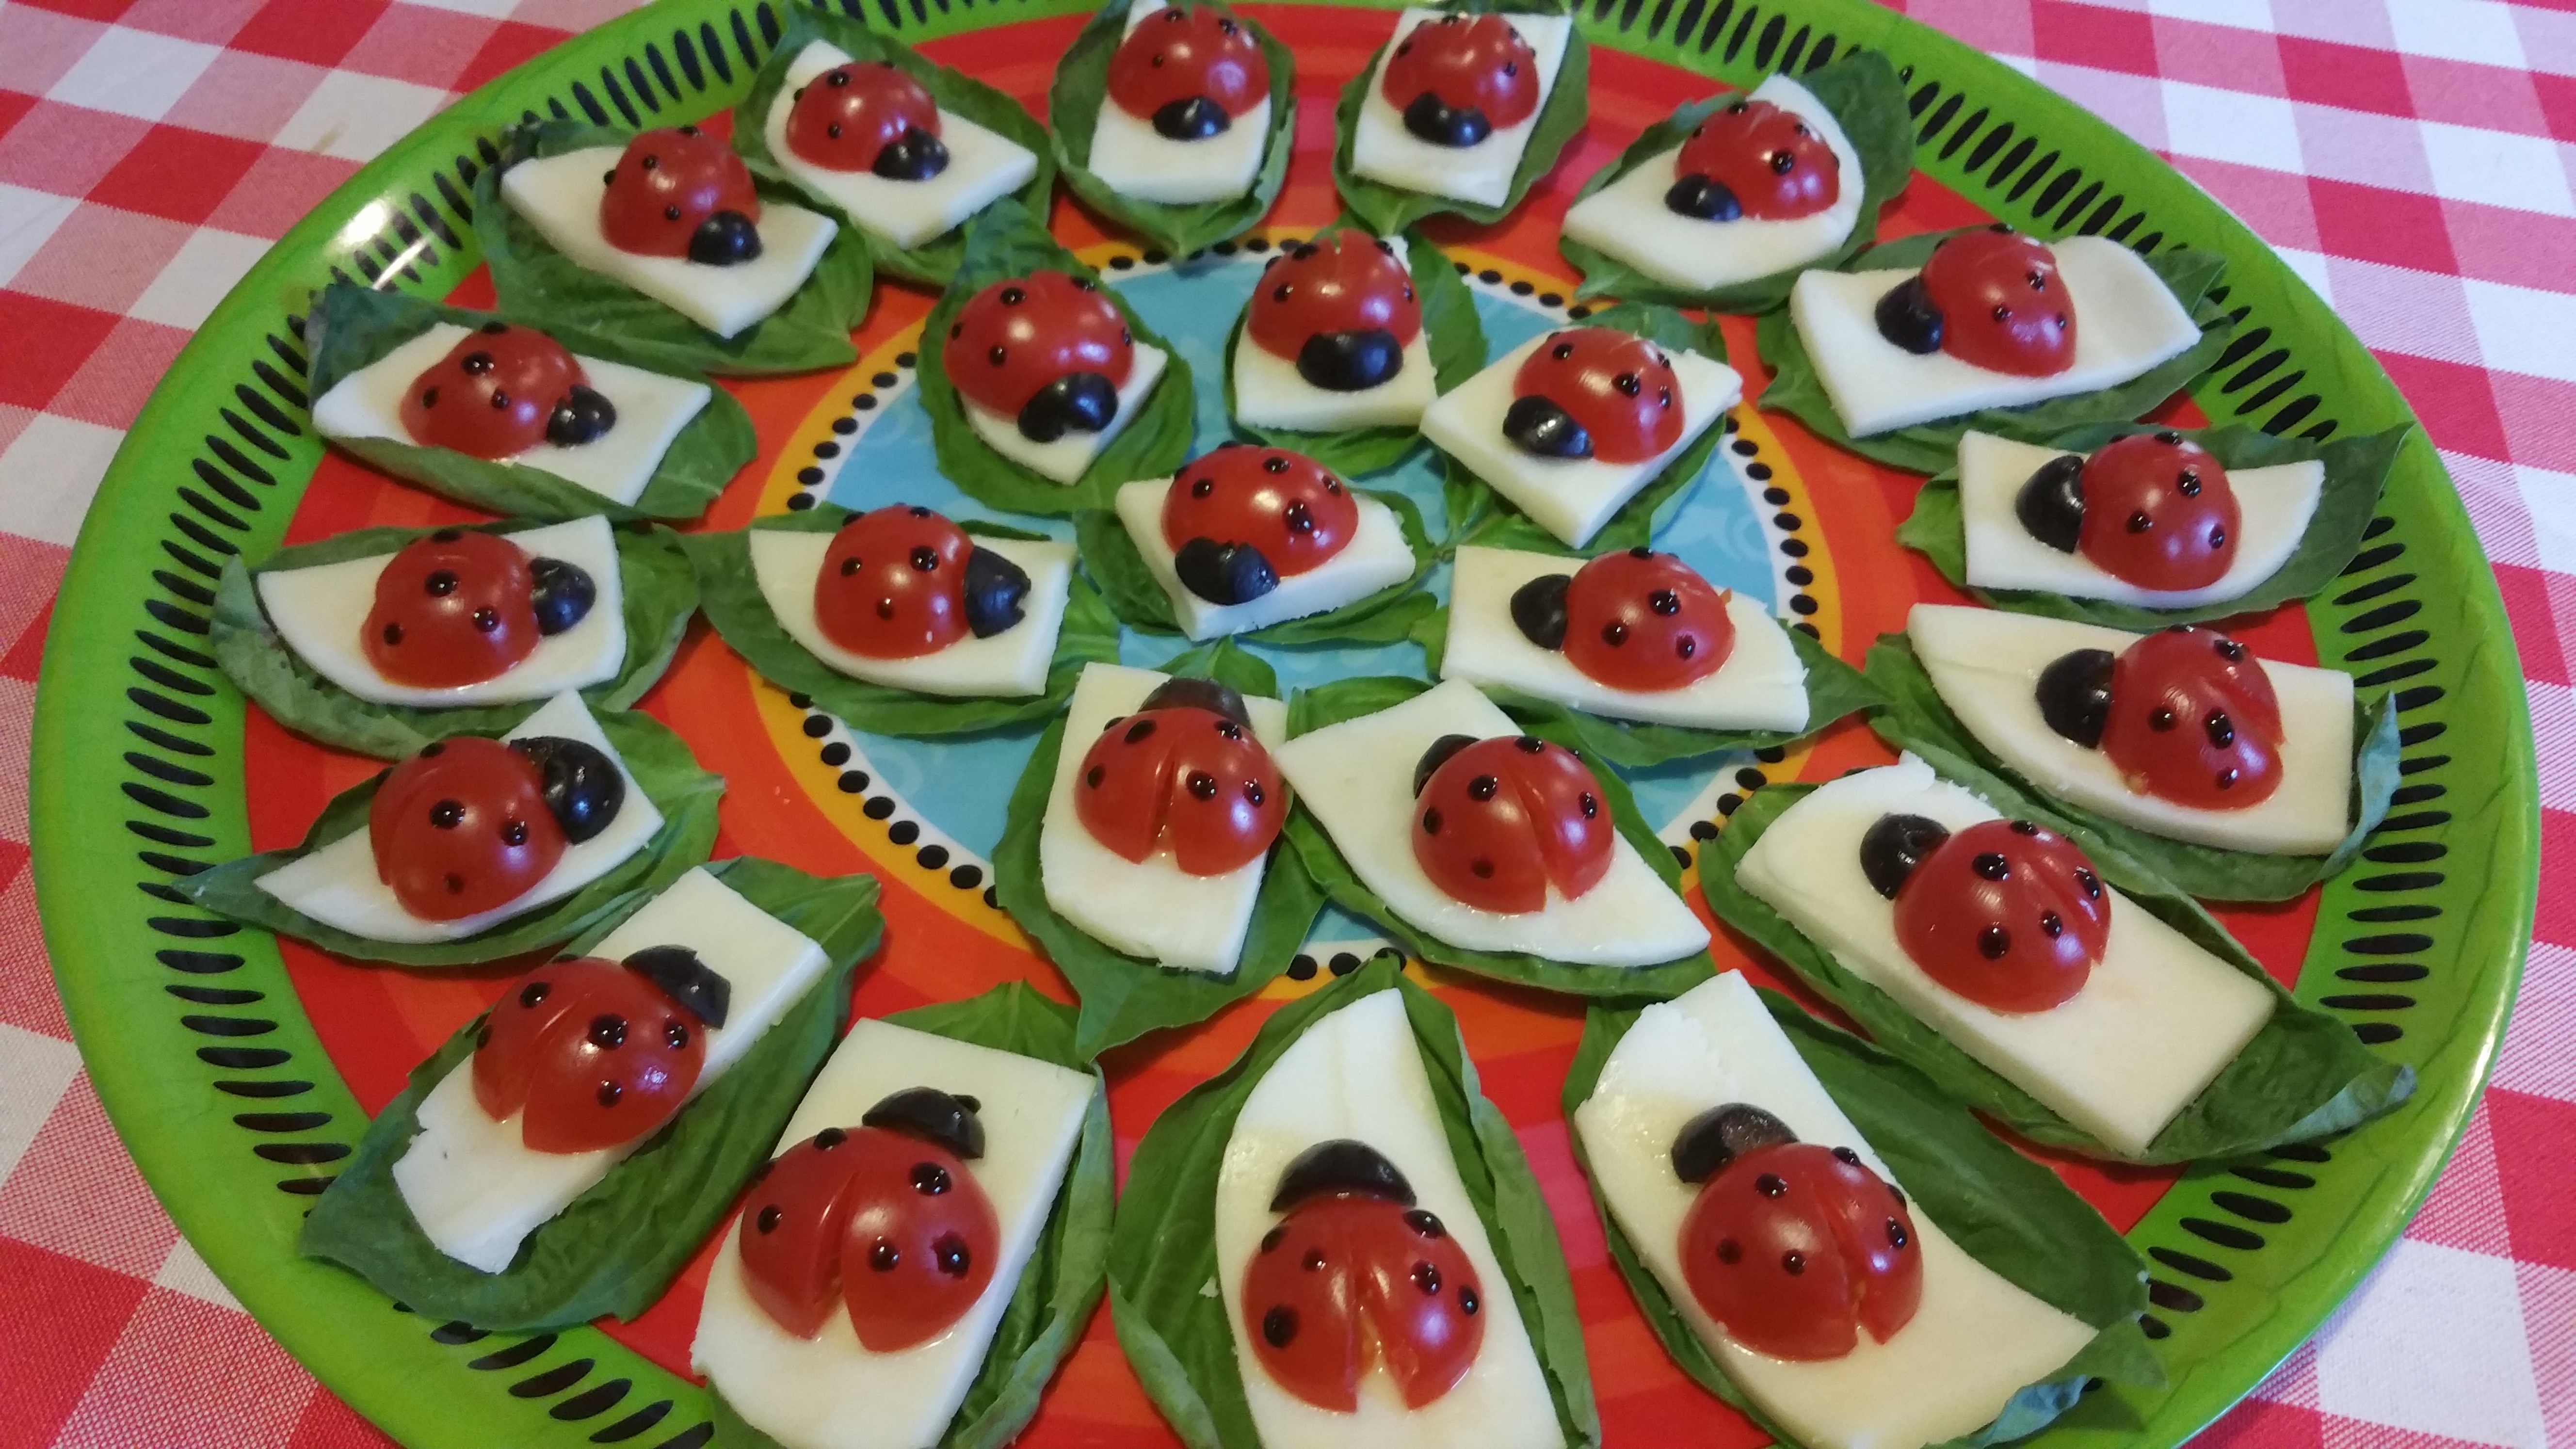
Talk about playing with your food! These ladybugs are simple to make and will delight any crowd.

As of yet I have been unsuccessful in tracking down the origin to credit the person who actually invented these.  Kudos, whoever you are!! and thanks to my friends who sent links to me because they knew I would enjoy making these.

So let’s get to the how of it.

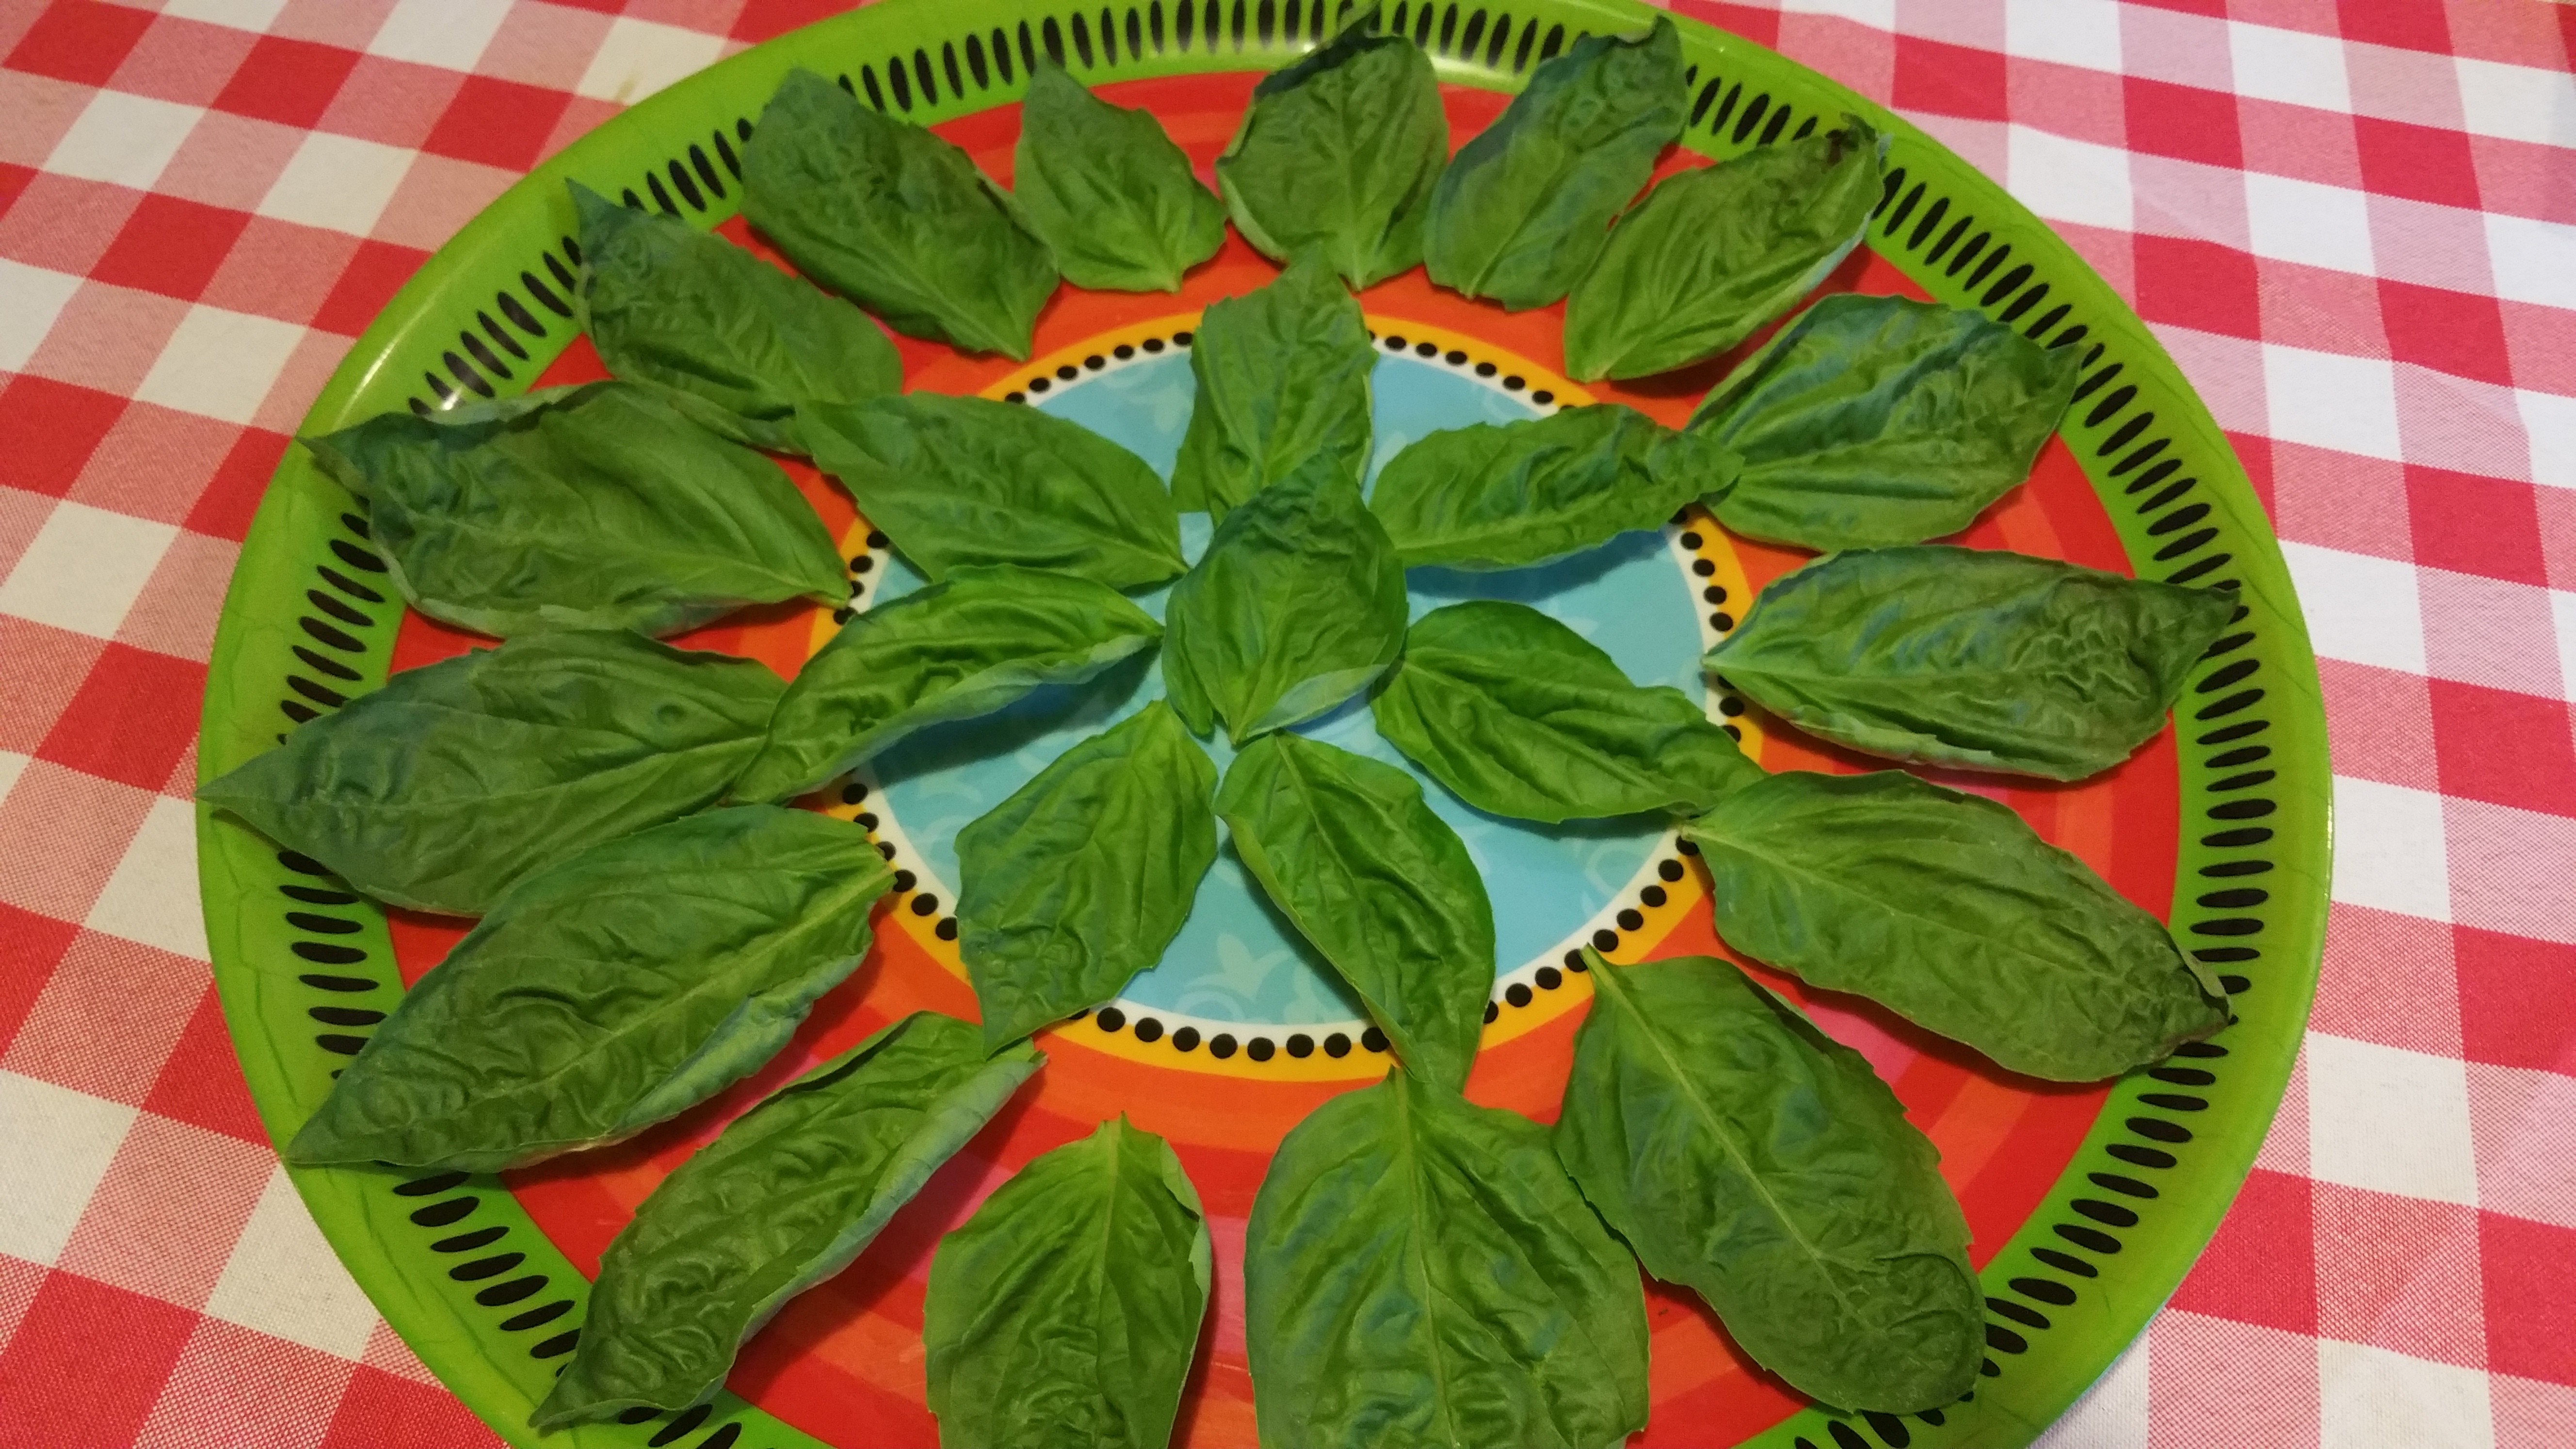
1. Clean and separate basil leaves and display them on your serving tray with the pretty, green side up.
Ladybug - leaves

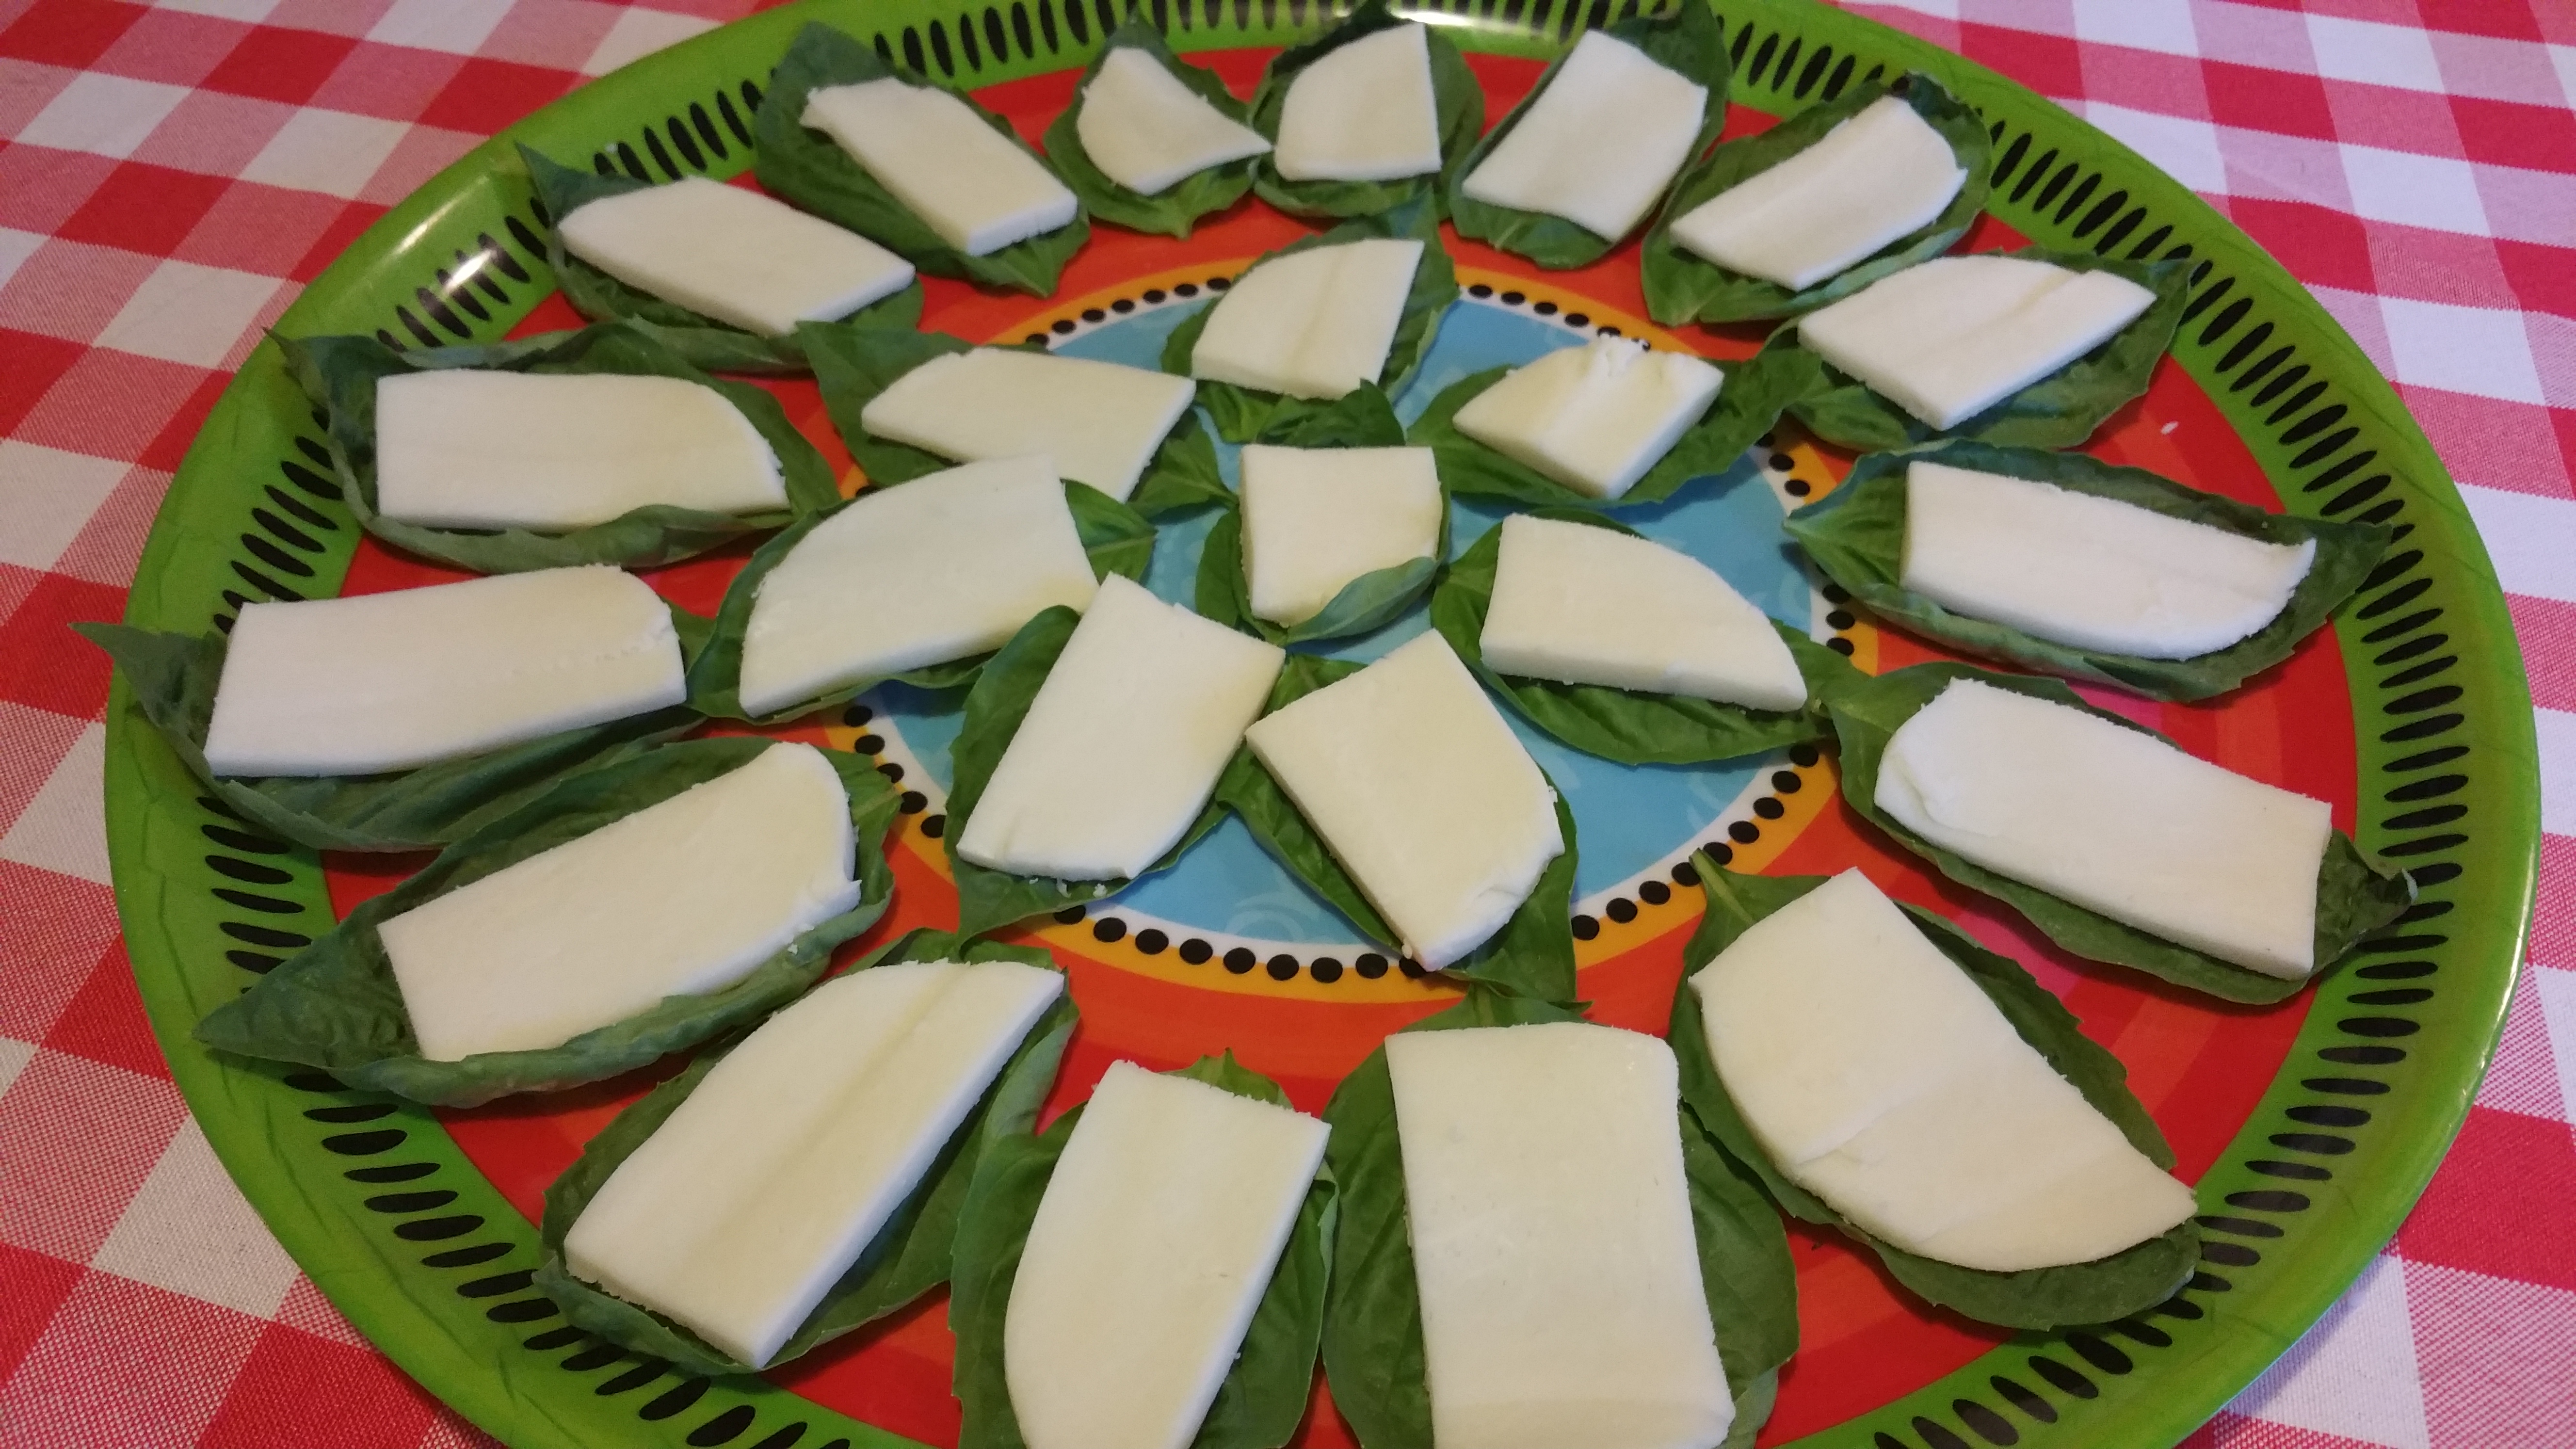
2. Slice mozzarella very thinly, and place one slice on top of each leaf. (Some versions show the leaf on top of the mozzarella, but I found it easier for guests to pick them up when the leaf was on bottom.)
Ladybug - cheese

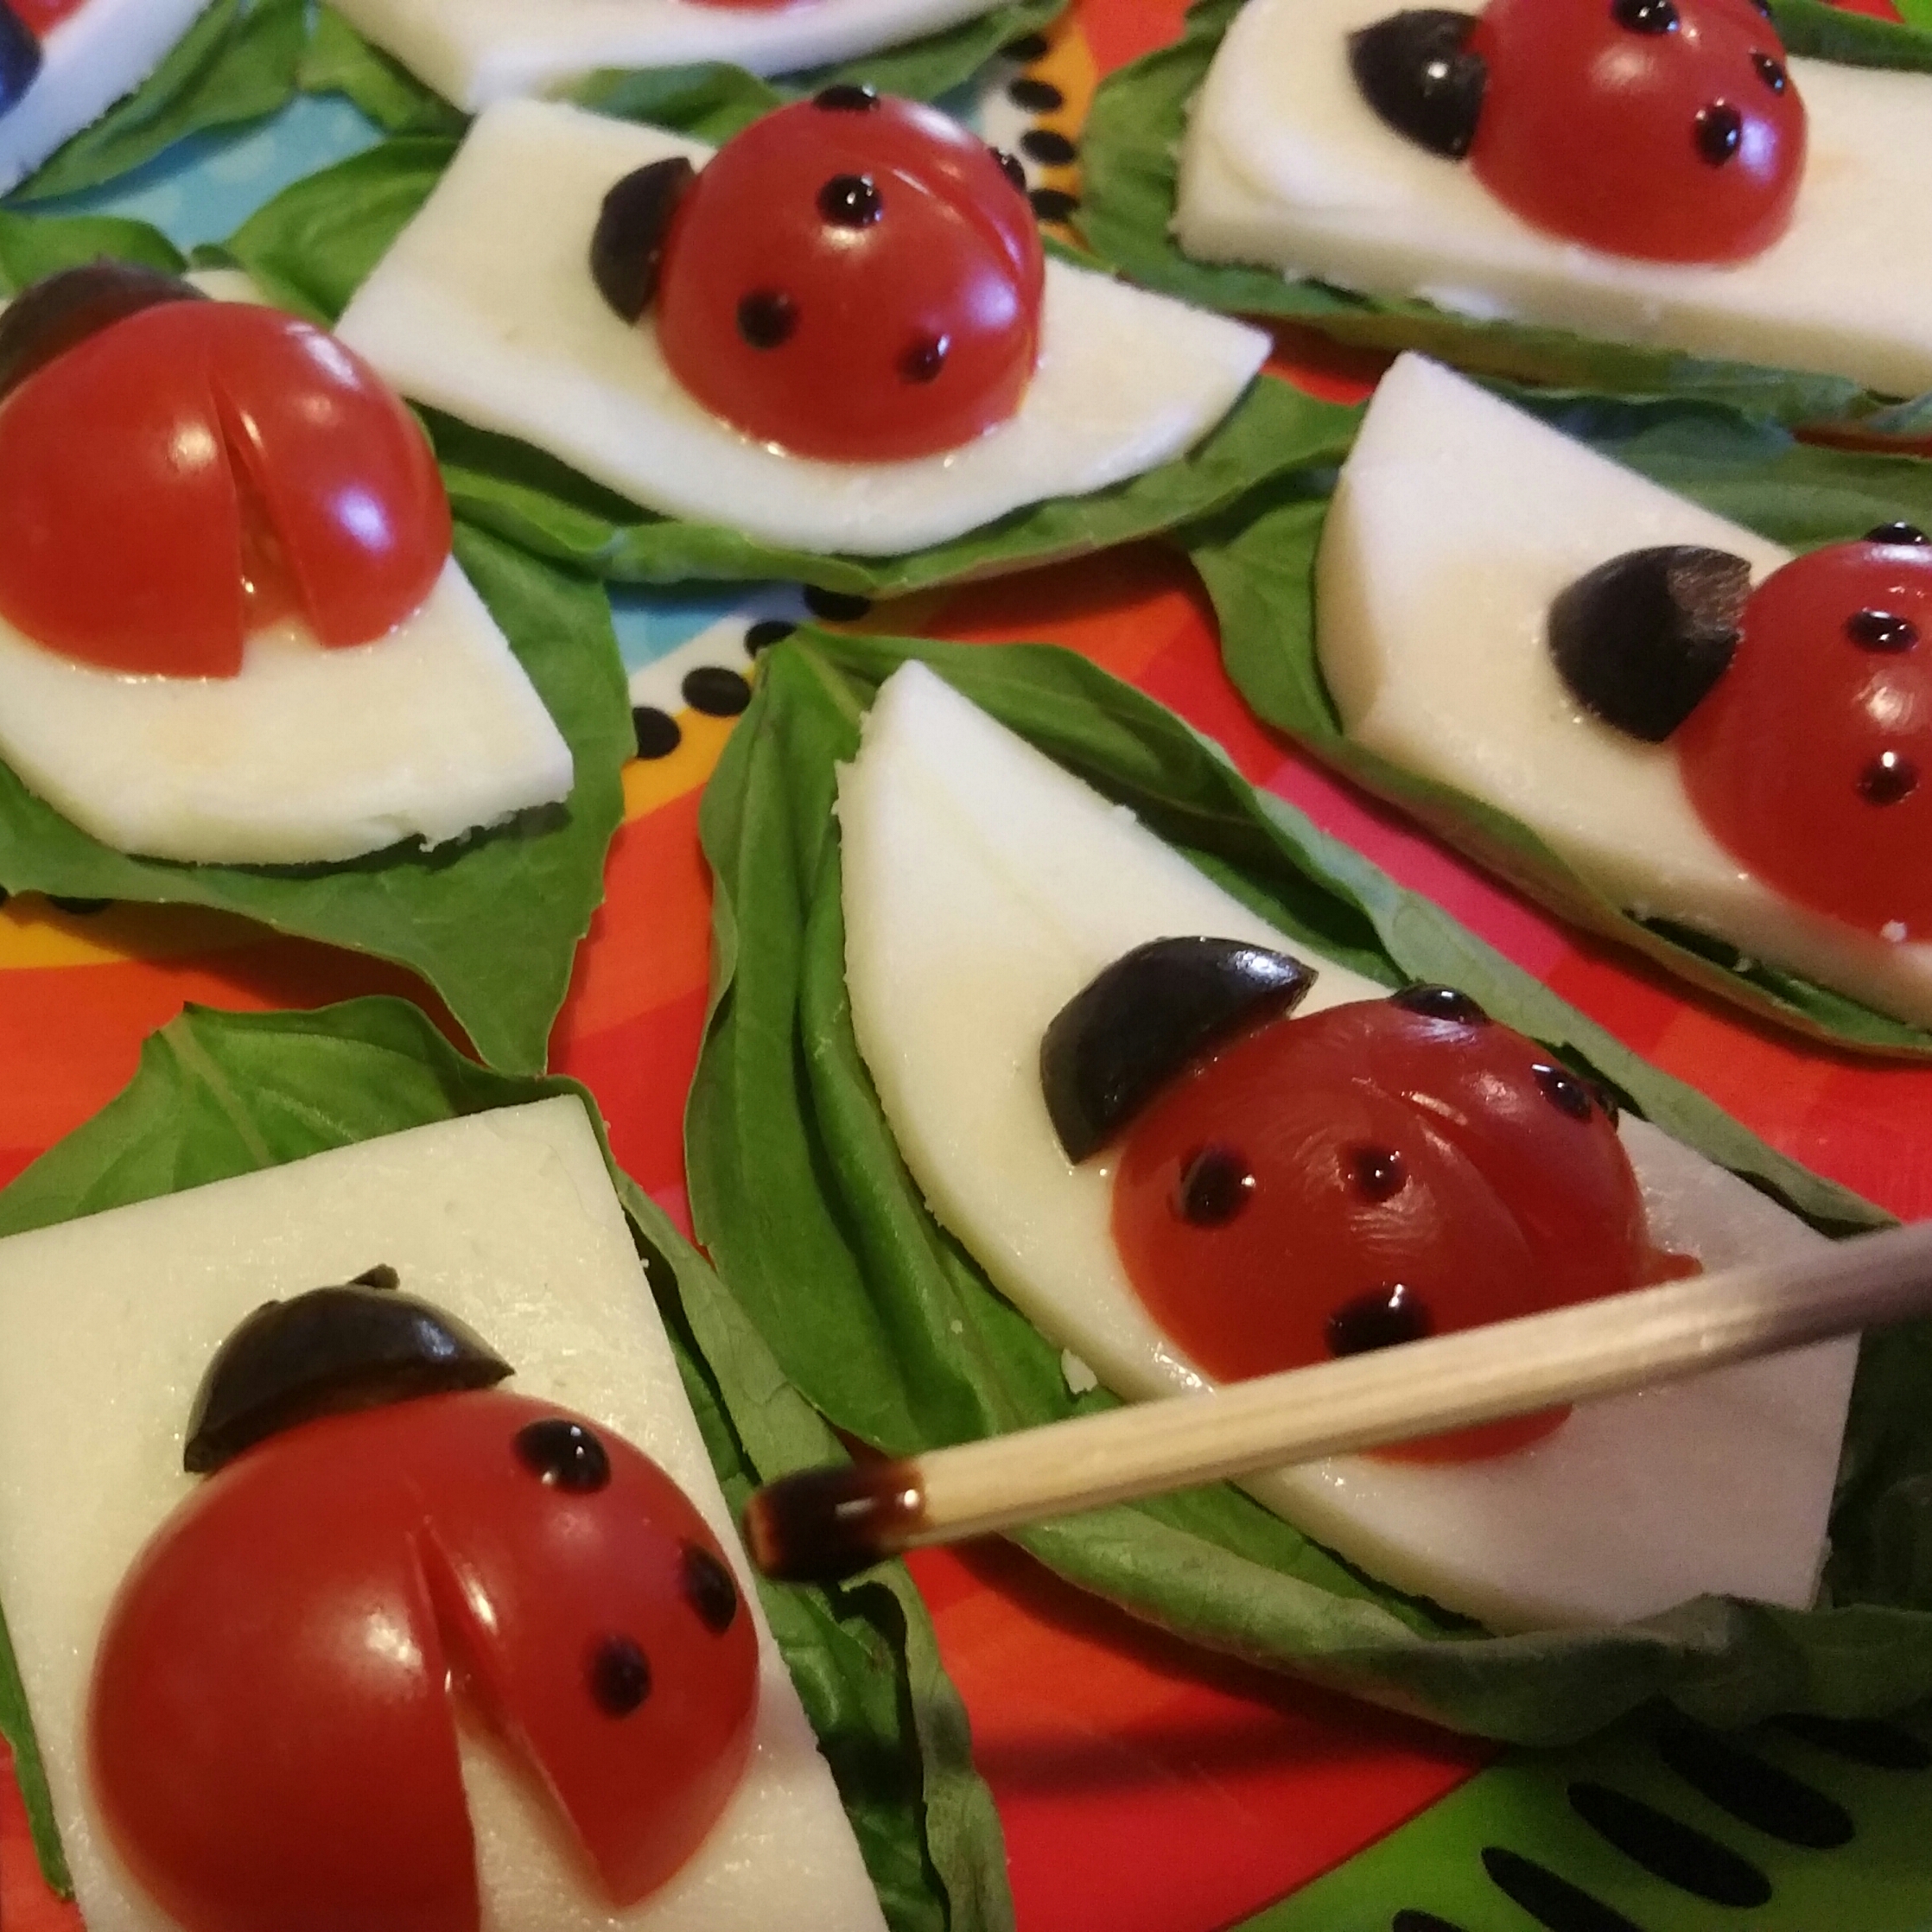
3. Slice cherry tomatoes in half. Then slice each half about three-fourths of the way through. Lay each half tomato on a slice of mozzarella and spread to look like a ladybug’s wings.

4. Place a black olive slice on the uncut end of each tomato to form the head. The rounded ends of the olives work best.

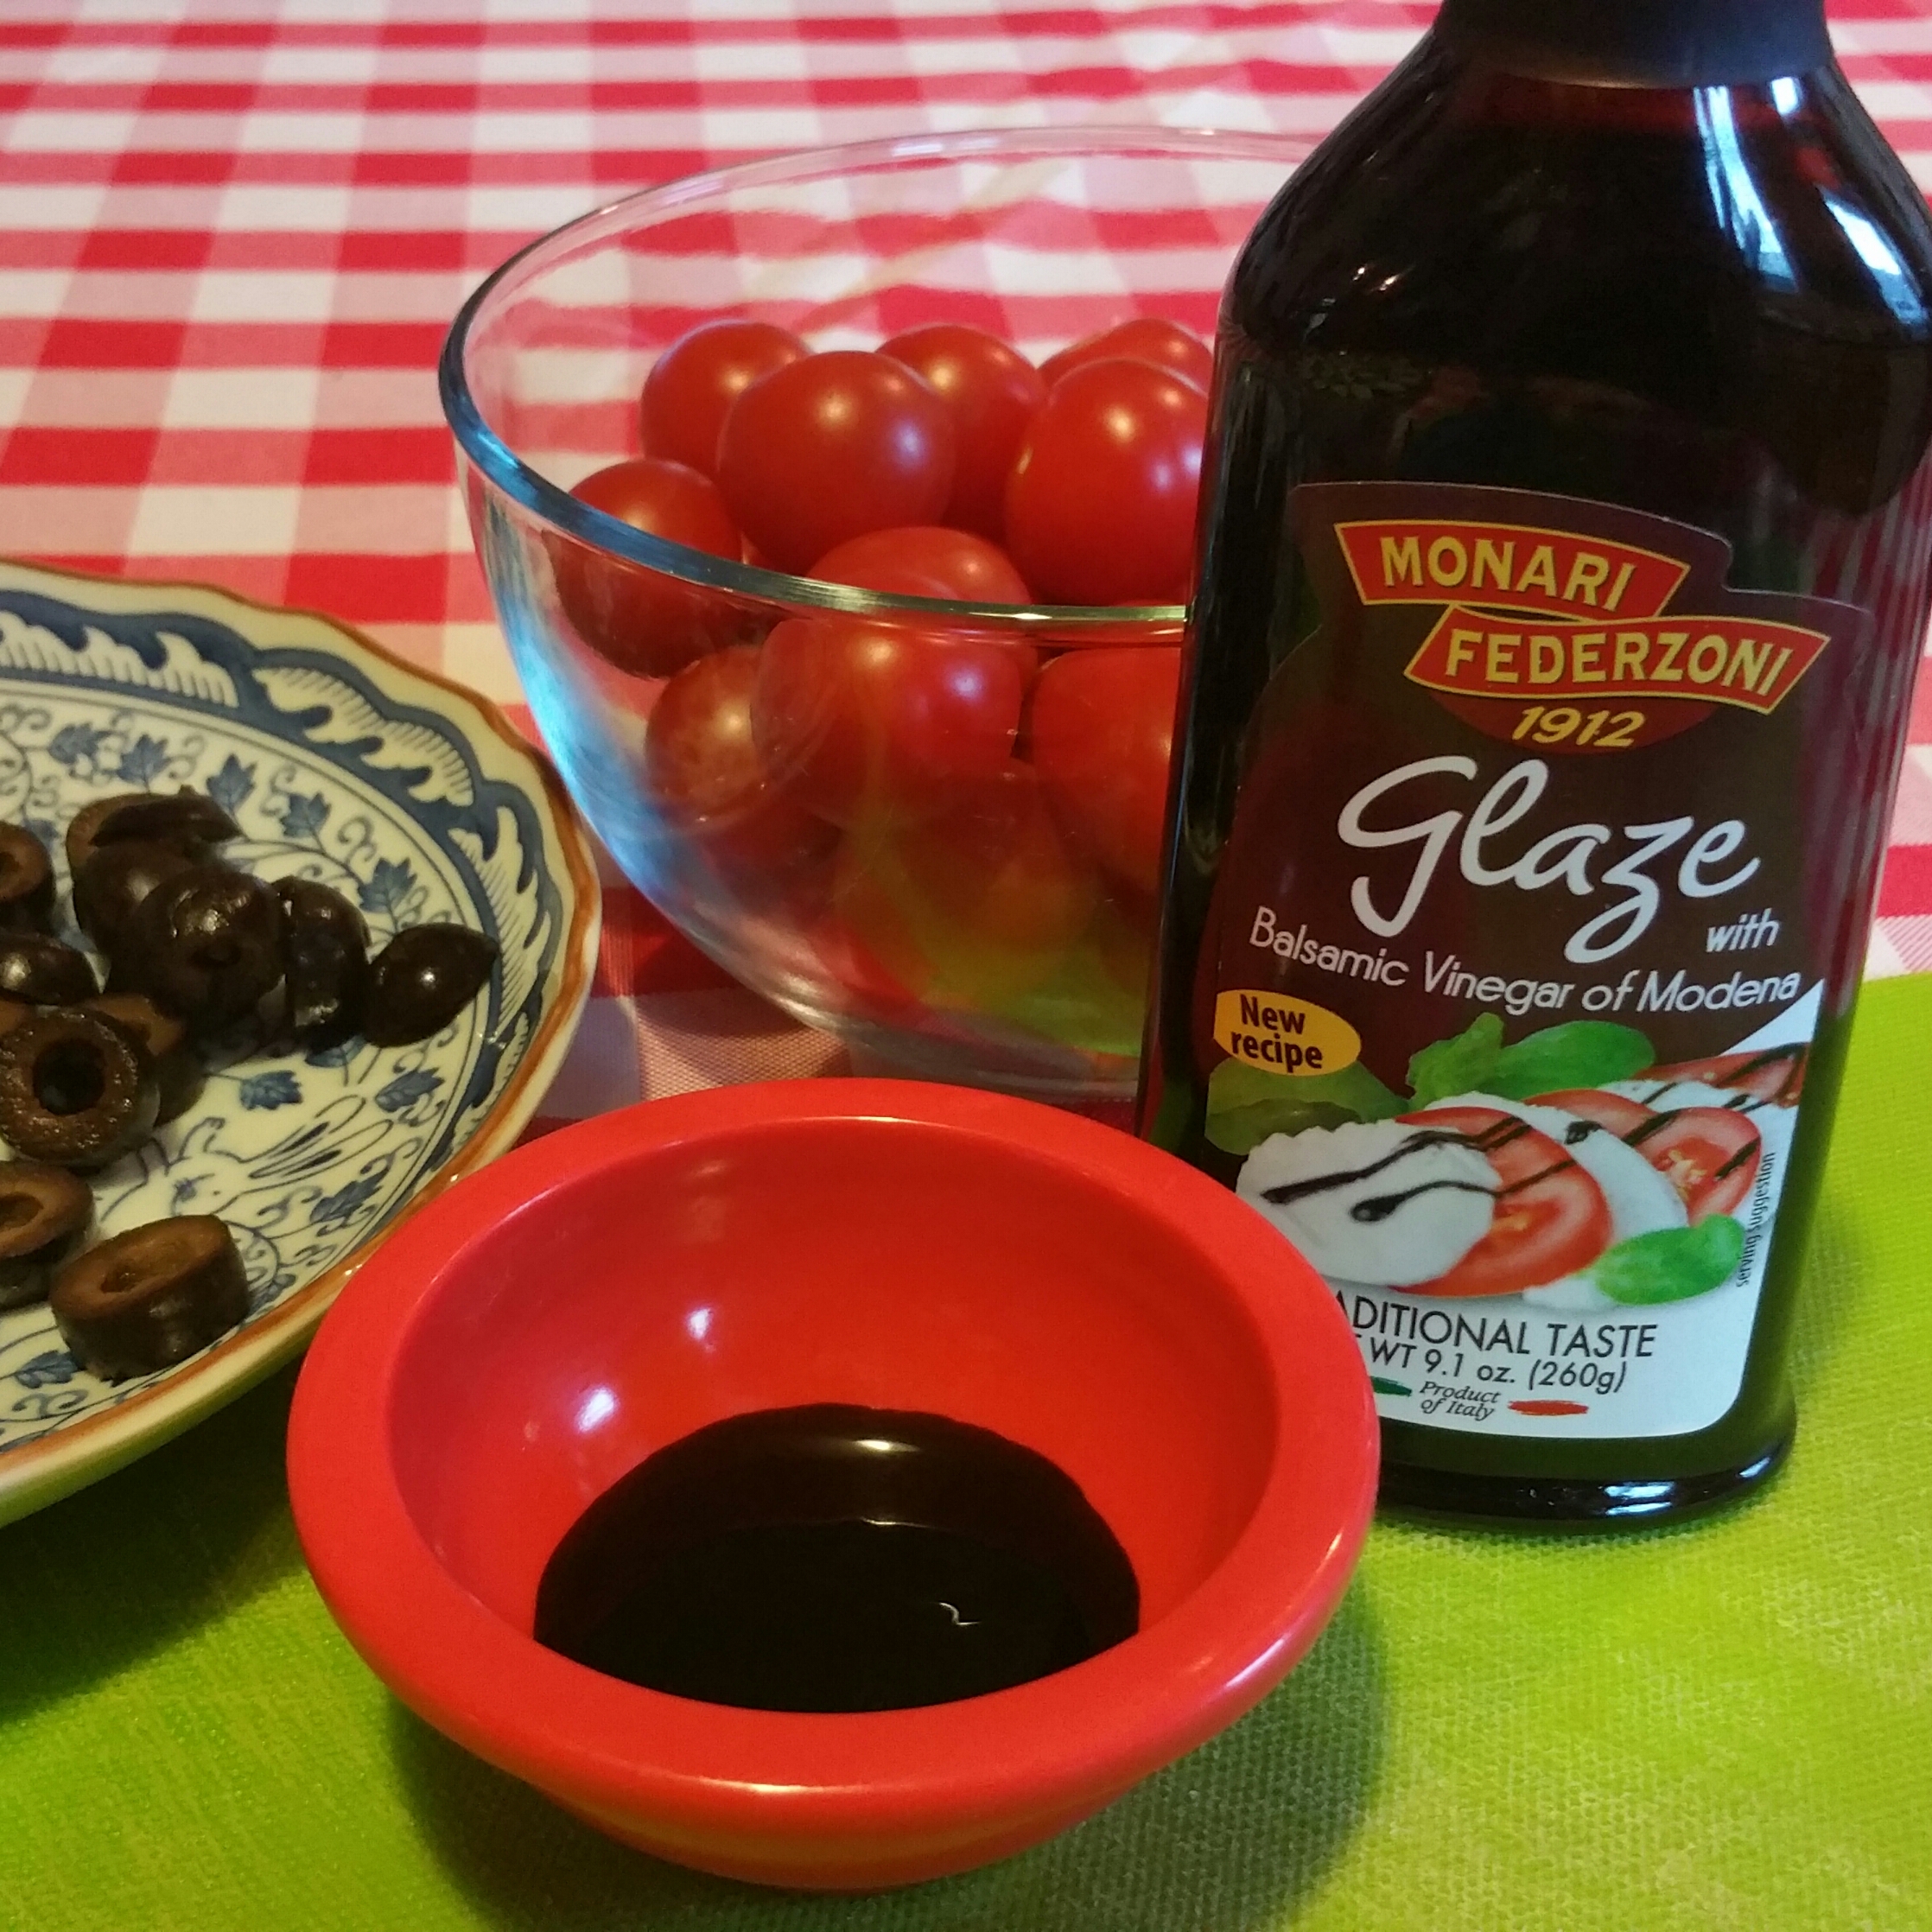
5. Place a little balsamic glaze in a dish and use a toothpick or skewer to paint dots of the glaze on the ladybug wings.
Ladybug - glaze      Ladybug - dots

That’s it. How easy! and how cute!

Stuffed Chayotes

20150509_111531-1

Such a special Mexican treat — Stuffed Chayotes.  Chayotes are Mexican squash, similar in size and shape to a large avocado, but very hard with a “seam” around the edges.  They make a wonderful shell for stuffing with all kinds of goodies.

This time I stuffed them with onion, red bell pepper, mushrooms, garlic, egg, bread crumbs, cilantro and cheese.
20150508_190810-1-1

First slice the chayotes in half along the seam and remove the seed.  Cover with water and bring to a boil.  Reduce heat, cover and simmer for 12 to 15 minutes, until tender.  Then drain them on a towel.
20150508_191539-1  20150508_204625-1

When cool enough to handle, scoop out the pulp leaving about a quarter inch of the shell all around.  Chop the pulp and let drain (or squeeze out excess moisture with towel).  Set shells in baking dish.
20150508_204857-1  20150508_205318-1

Toast bread and slice into cubes.  Chop pepper, onion and mushrooms, and mince some garlic.
20150508_194241-1   20150508_193020-1

Sauté the peppers, onion, mushrooms and garlic in butter.
20150508_194352-1

Then add the bread crumbs, chayote pulp, egg, cilantro, salt, pepper and a little chicken bouillon.  Combine well and spoon the mixture into the chayote shells.  Cover with cheese (I used parmesan cheese to save on the fat and calories, but a Mexican blend would also be yummy).
20150508_205948-1

This recipe can be made ahead up to this point and refrigerated overnight.  Let stand at room temperature about 30 minutes before baking.

Cover with foil and bake at 350 degrees for about 25 minutes.   Uncover, add more cheese and bake an additional 3 to 5 minutes for the cheese to melt.

Then enjoy!!  These are best served hot, but I like them chilled the next day, too.

Print friendly recipe:  Stuffed Chayotes


Bacon Wrapped Asparagus

Bacon Wrapped Asparagas clipped

Ummmm… bacon…

Man-oh-man! Easy and delish!  Only two ingredients (three or four if you add spices).

20150411_064049

1.  Trim the tough ends off the asparagus.

2.  Cut bacon strips in half.

3.  Wrap half a bacon strip around each asparagus spear.  I had planned to secure with toothpicks but didn’t have any and found that the bacon stuck just fine on its own.


4.  Sprinkle spices to taste.  I just use garlic.

20150411_065846-1

5.  Bake at 450 degrees for 15 to 20 minutes, until the bacon is done to your liking.  Simple as that.

Note:  By the time the bacon pleased me, the asparagus looked overcooked, but it was absolutely delicious and a big hit at my brunch.  My son suggested baking it at 350 for 15 minutes and then using the broiler for a minute or two to see if that helps crisp the bacon without overcooking the asparagus.  He’s such a gem.  I’ll try that next time.

20150411_111108-2

Printer-friendly recipe:  Bacon Wrapped Asparagus

Rainbow Roasted Vegetable Skewers

Skewers on Baking Sheet

What a colorful way to serve roasted veggies.  Depending on what’s in season, you can use cherry tomatoes… red, orange, yellow and green bell peppers… yellow and green zucchini… yellow and orange squash… red onions… purple potatoes… any veggie you like really.

When using wooden skewers, be sure to soak them in water a few hours or overnight so they don’t burn in the oven or on the grill.Skewers Soaking

Cut vegetables into various sizes depending on how quickly they will cook (potatoes and butternut squash take longer to cook than bell peppers and zucchini).  Put the cut veggies into a plastic food storage bag, pour in olive oil and salt and pepper, seal and shake until evenly coated.  Then put the sealed veggies in the fridge for at least two hours (overnight is fine).
Veggies and Oil

Arrange the veggies onto the skewers in colorful patterns.  Cook on a barbeque grill or bake in a 450 degree oven until tender and nicely browned.  They need careful monitoring because the time can vary so much depending on the combination of vegetables used.  As long as they don’t burn, I think roasted veggies taste better the longer they are cooked, but that’s my preference.  You may like yours crunchier.
Skewers on Platter
They taste best when served hot, but even cold roasted veggies are yummy.


Crudités Art & Roasted Red Pepper Dip

Crudites

Absolutely simple yet so impressive!

You can see that I simply sliced some carrots, cucumber, radishes, celery and green onions, but instead of loading them on a platter around a bowl of dip, I arranged them into a picture.

You could use pretty much any type of veggie to create any scene you want.  One warning though: I had a terrible time getting my guests to eat any because they didn’t want to disturb the picture.

Roasted Red Pepper Dip 2For the dip, I served roasted red pepper dip.  So easy and yummy.  Finely chop 1/2 cup of almonds and one clove of garlic.  Add 1 cup of roasted red peppers from a jar, drained, 2 teaspoons red wine vinegar and 2 tablespoons olive oil.  Whisk together and chill.

Roasted Red Pepper Dip

There you have it … and very simple yet impressive tray of veggies and dip.

Crudites and dip

Printable recipe:  Roasted Red Pepper Dip

Enjoy this along with many of the easy brunch recipes to come.

Blanched Asparagus

20150110_213141-1-1

I was shocked to discover how SIMPLE it is to prepare asparagus.  Seriously, it’s so SIMPLE I feel a little silly posting about it, but hey, maybe some of you don’t know either.

1.  Trim asparagus.   Some people bend the spears until they naturally snap.  I just slice them to the same length to fit my serving platter.
20150110_210131-1

2.  Rinse the asparagus well and add to boiling water.
20150110_210822-1

3.  For thin spears, boil only a minute or two.  Medium or thick spears may take two or three minutes, but do not overcook.

4.  Remove asparagus from boiling water and submerge it in cold or ice water to stop the cooking process.
20150110_210257-1

5.  Drain and refrigerate until completely chilled.

It’s that SIMPLE.  For a printable version, click Blanched Asparagus Recipe.

Kale & Roasted Sweet Potato Salad

salad narrow
I’ve never in my life wanted to ask
someone
for a salad recipe!” – Laura K.

The evening before my first brunch, it occurred to me that the only items on the menu my two gluten-free friends would be able to eat were the steamed asparagus and fresh strawberries.  I searched online for a recipe that would use ingredients I already had on hand and found a recipe for a kale salad that had roasted vegetables and lentils.  Yum.

Turned out I didn’t have any lentils on hand (okay, actually I did, but my pantry was so disorganized that I didn’t find them until a few days later <heavy sigh>), but what I did find was a packet of Seeds of Change Quinoa & Brown Rice.  I had bought a case at Costco some time back.  It makes a delicious meal all on its own and only takes
90 seconds in the microwave (now that’s MY idea of cooking dinner after a long day at work).  Tell you what, it was the perfect ingredient for my kale salad.  Time to get another case.

Here’s a link to print the recipe for Kale & Roasted Sweet Potato Salad, and below is a step-by-step description of how I made it.  I recommend this salad for any meal.  Delish!

  1. Preheat oven to 400 degrees F.
  2. Peel and cube a large sweet potato.  You can use any kind, but I prefer the jewel sweet potato because its color and flavor are yam-like but it has the high fiber of a sweet potato.
    Sweet Potato
  3. Chop a red onion into large wedges.Onion
  4. Toss the sweet potato and onion with 2 tablespoons of olive oil. I find it easiest to put the vegetables and oil in a plastic bag and kneed the veggies to coat evenly.
    Baggie
  5. Spread the vegetables on a baking sheet covered with foil and season to taste.   My seasoning of choice for probably half of everything I cook is McCormick’s Garlic Pepper.  That’s all I used on these veggies and I can’t imagine them tasting any better.
    Ready for oven
  6. Roast for approximately 40 minutes until veggies are tender and edges are nicely browned.
    roasted veggies
  7. Remove and discard the tough kale stems and slice the curly leaves into bite-sized pieces.
    kale to cut  kale and stems
  8. Add two tablespoons olive oil and one finely minced clove of garlic to a saucepan over medium high heat.  Sauté until garlic is tender and slightly browned, about two minutes.
    garlic in oil
  9. Add the kale and cook until it is wilted but still slightly crunchy, about five minutes.
    kale cooking
  10. Tear open a packet of Seeds of Change Quinoa & Brown Rice and microwave for 90 seconds.  Pour contents over kale.
    Seeds of Change  kale with rice
  11. Combine roasted veggies, kale and quinoa and brown rice. Serve warm or chilled.
    salad close up