Category Archives: Easy Brunch Recipes

Pizza with Arugula, Ricotta & Red Grapes

20150308_095056-1

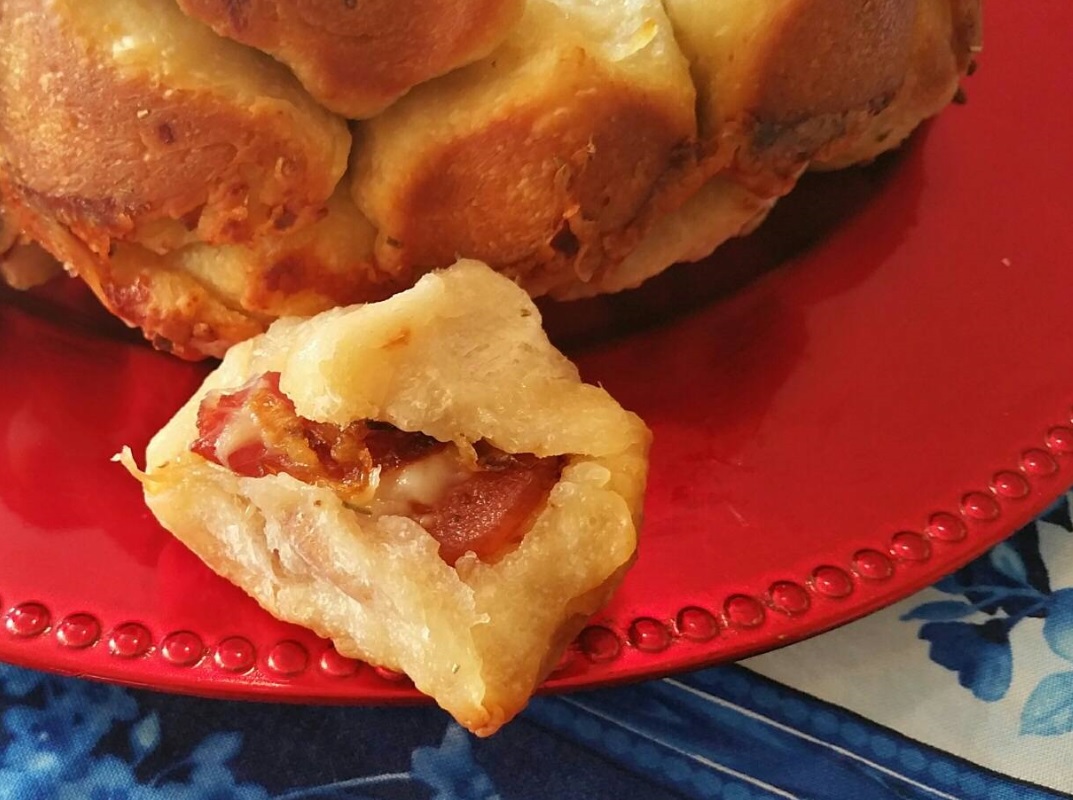
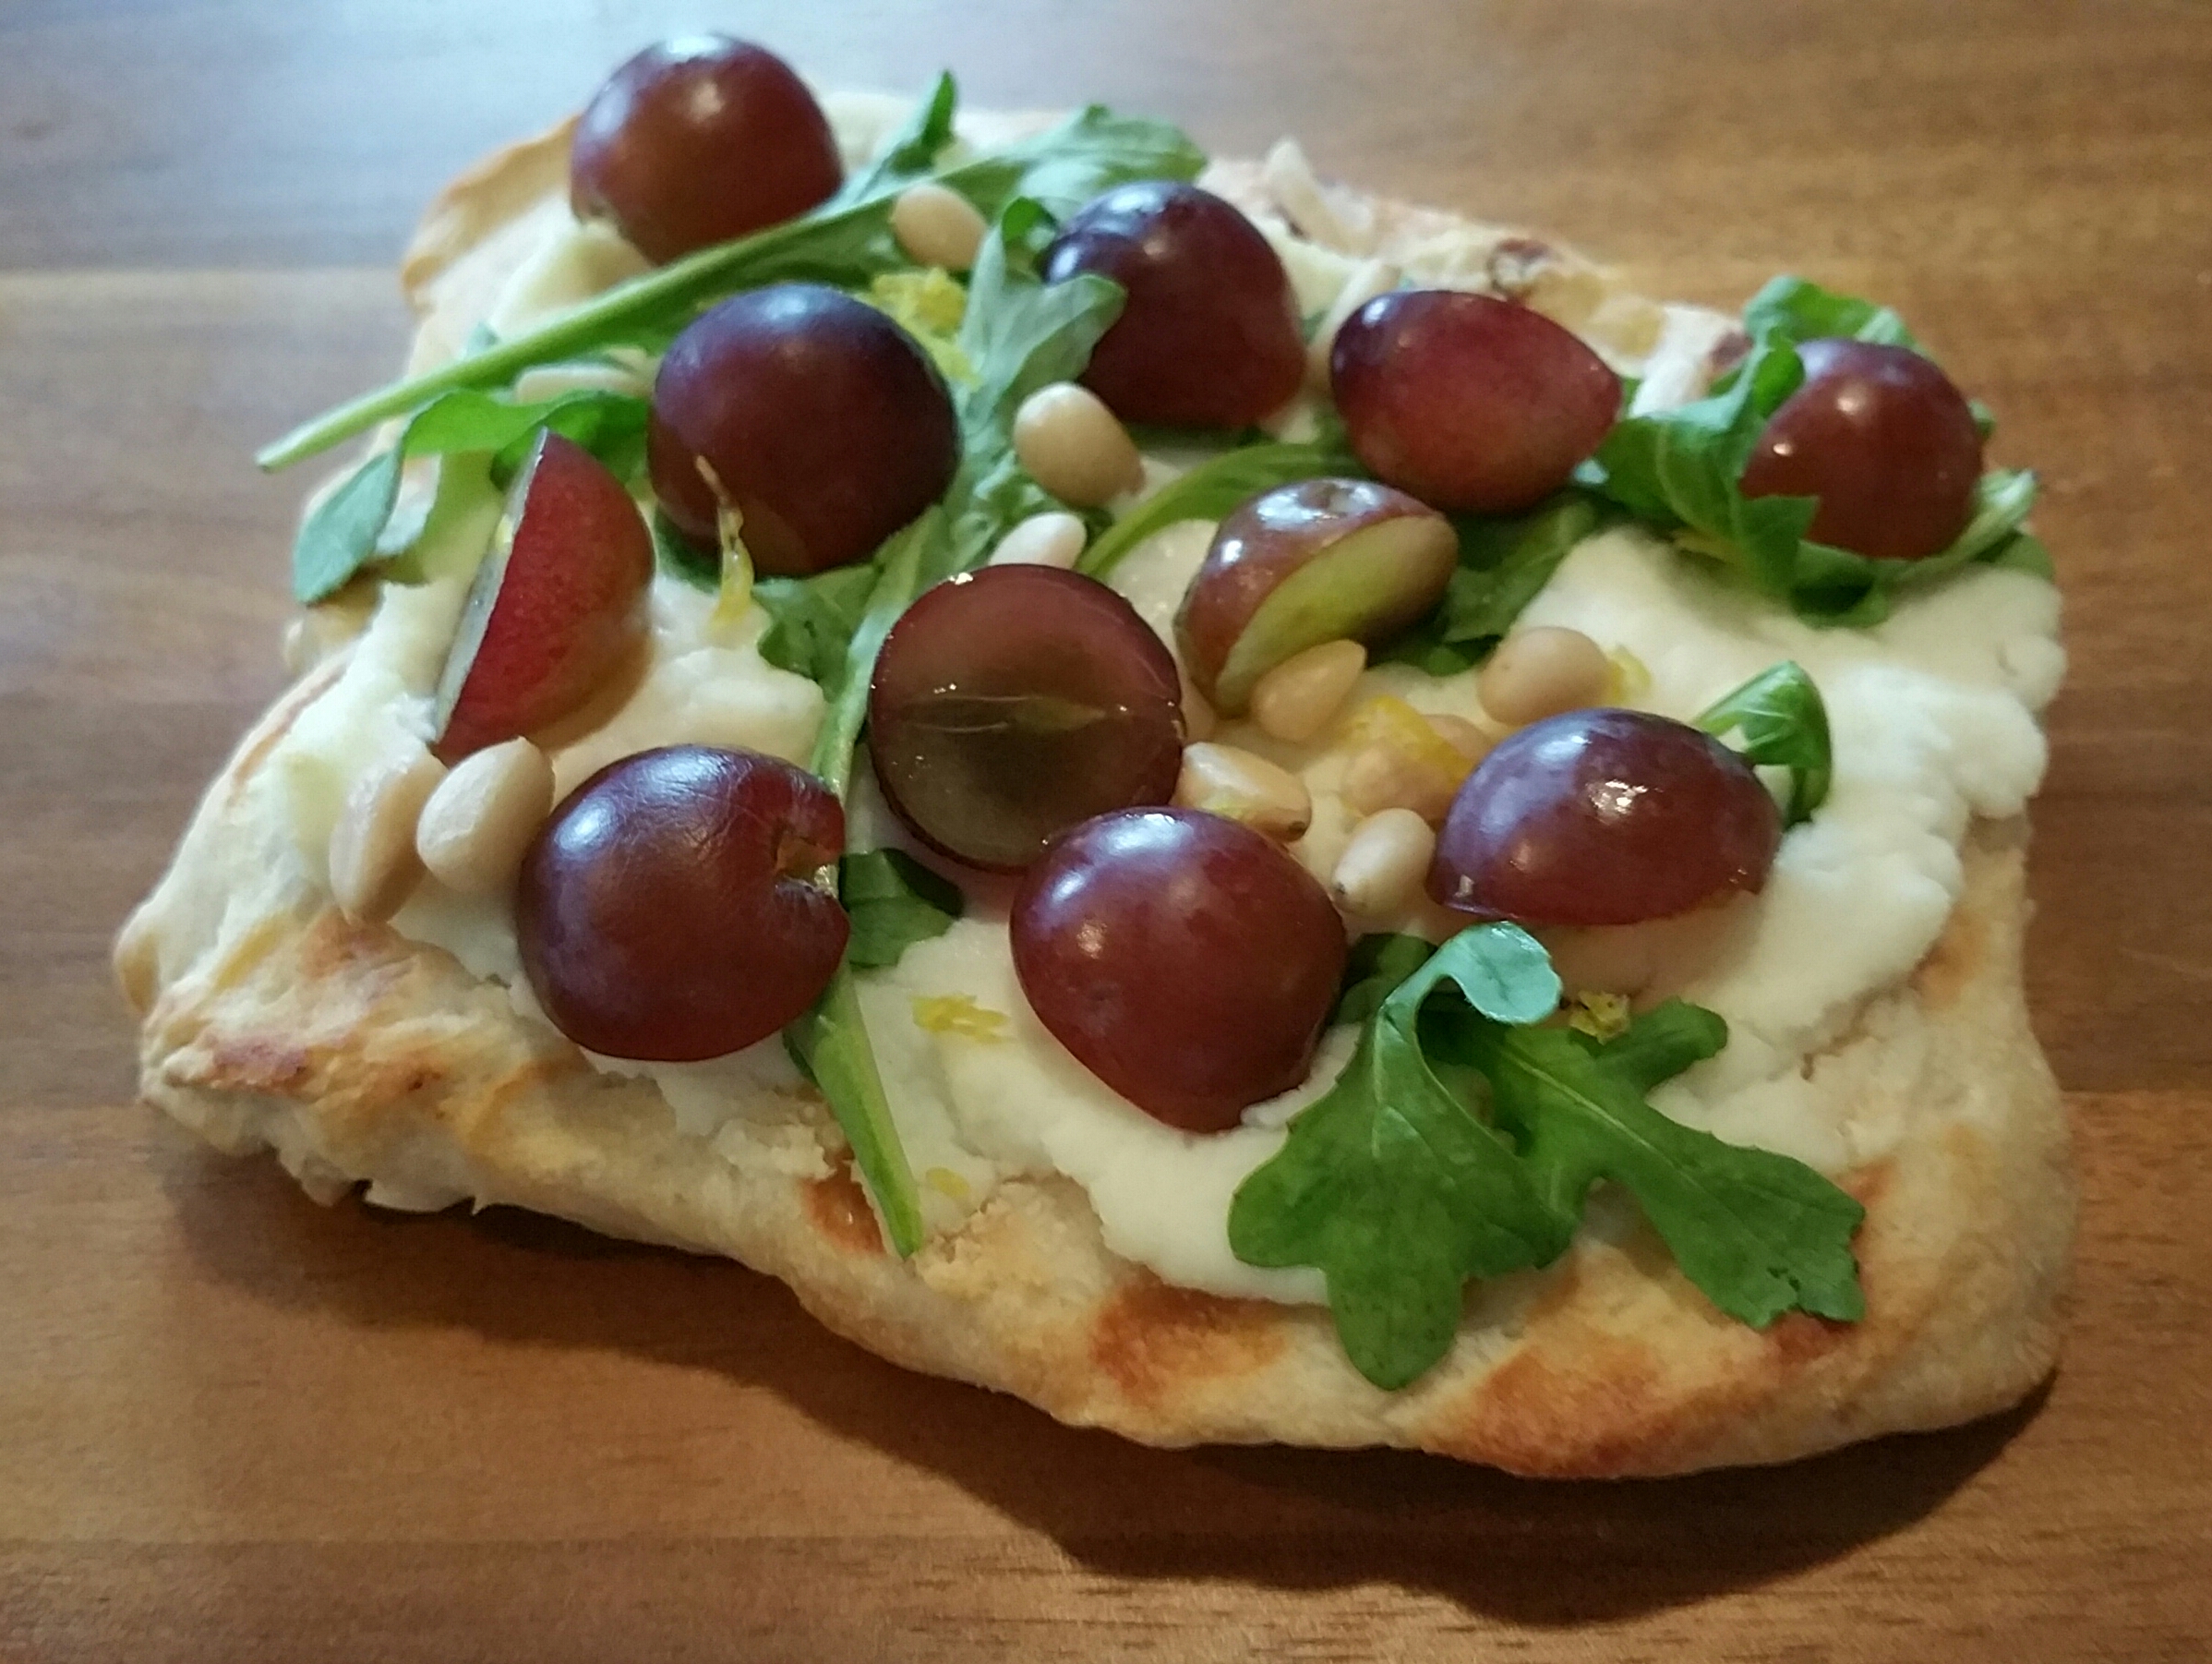
Here’s a truly unique and delicious pizza, and it’s so quick and simple to make.  It was featured in Dinner at Tiffini’s and People magazine.

Ingredients:
20150308_085812-2
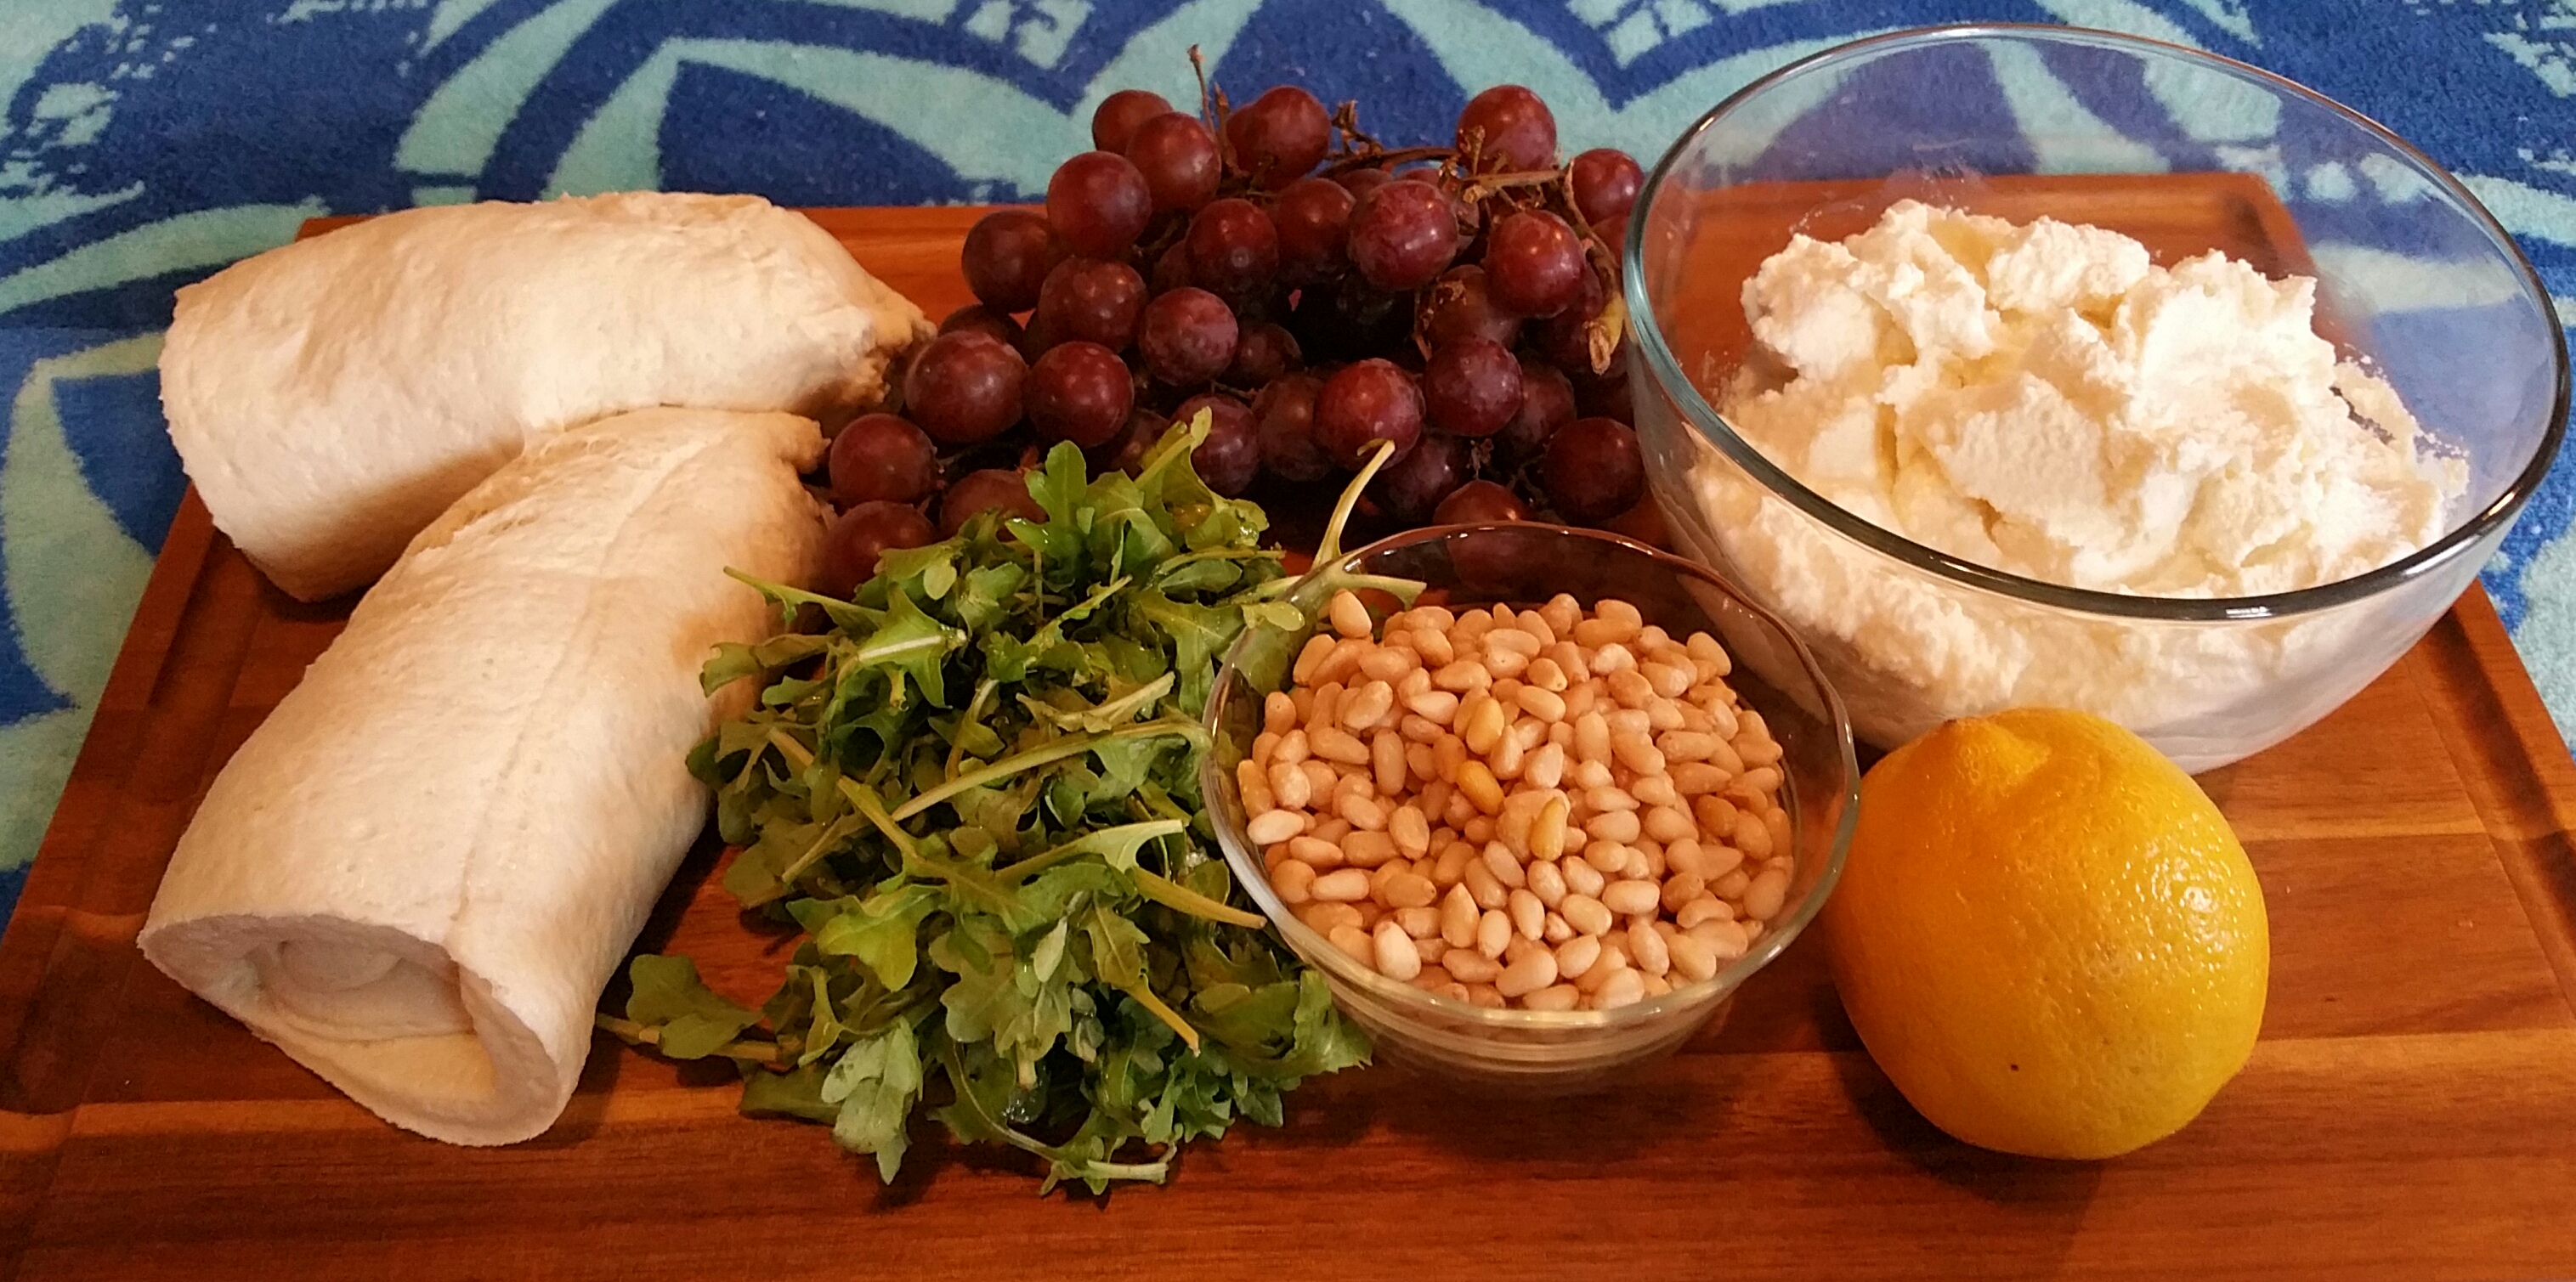
8 oz refrigerated pizza dough, halved
1 cup ricotta cheese
2 cups arugula
1 cup red grapes, sliced in half
1/4 cup pine nuts
Zest of one lemon

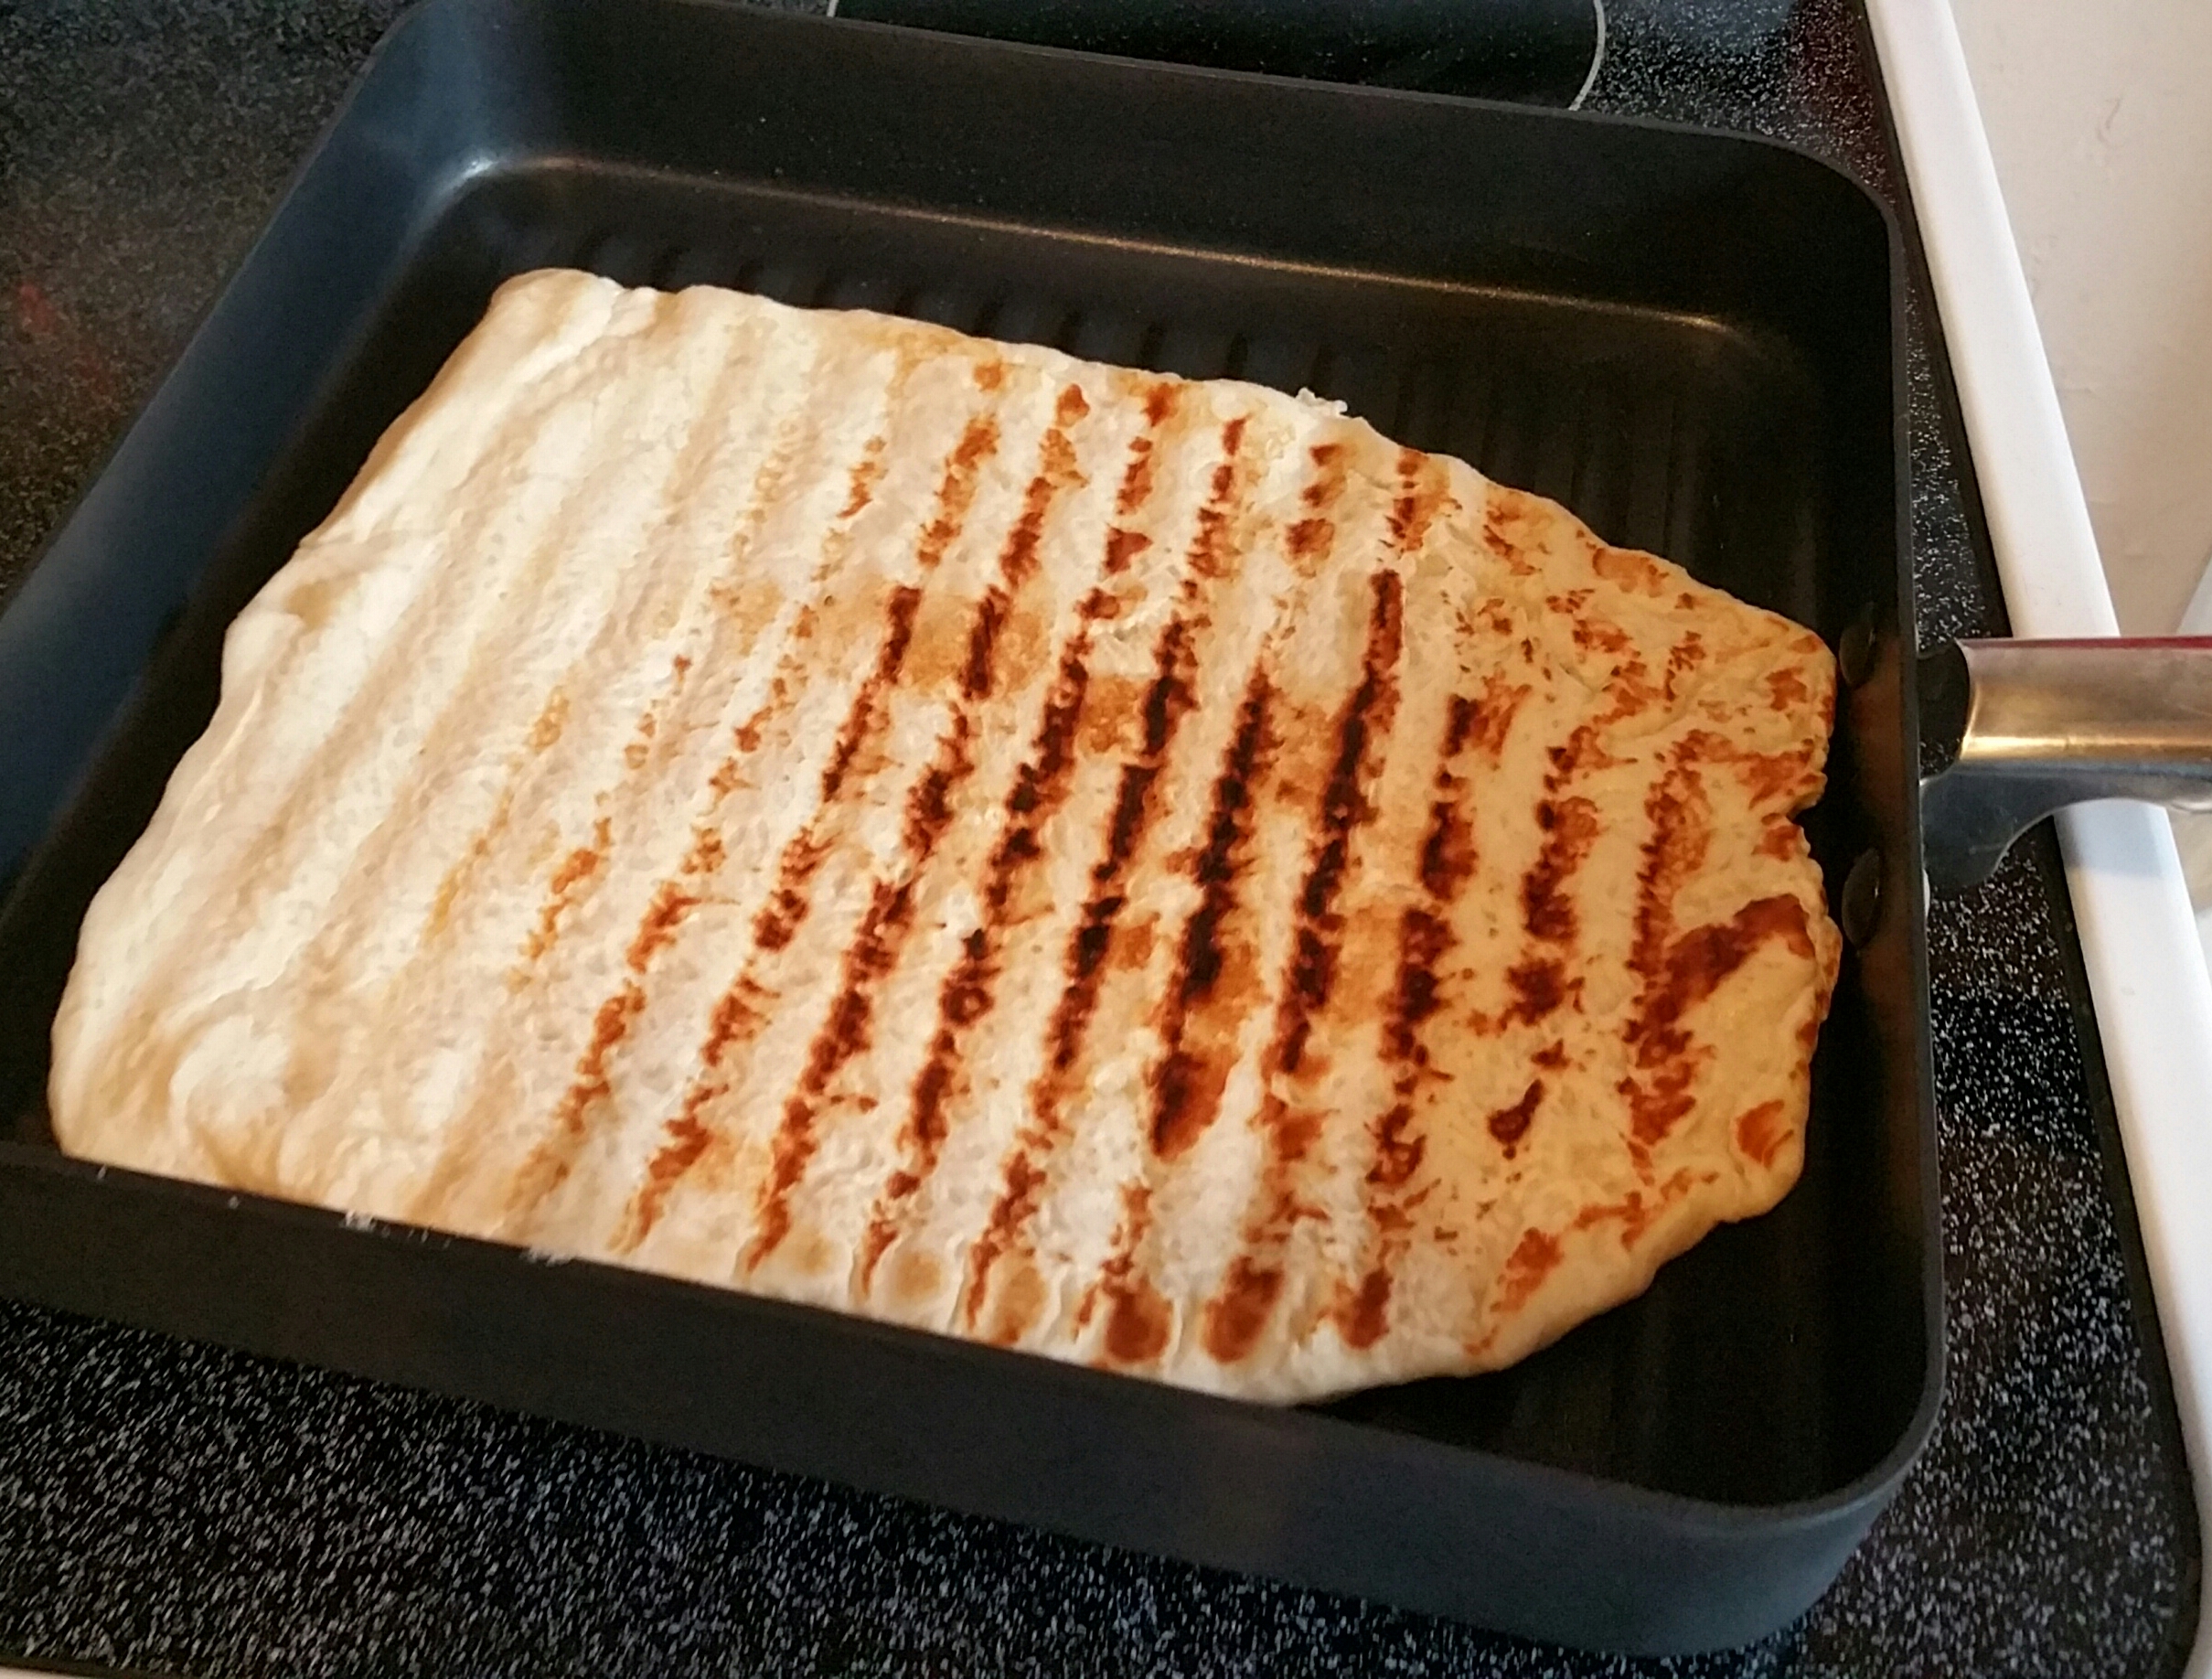
1.  Heat a grill pan over medium-high heat and preheat oven to 400.

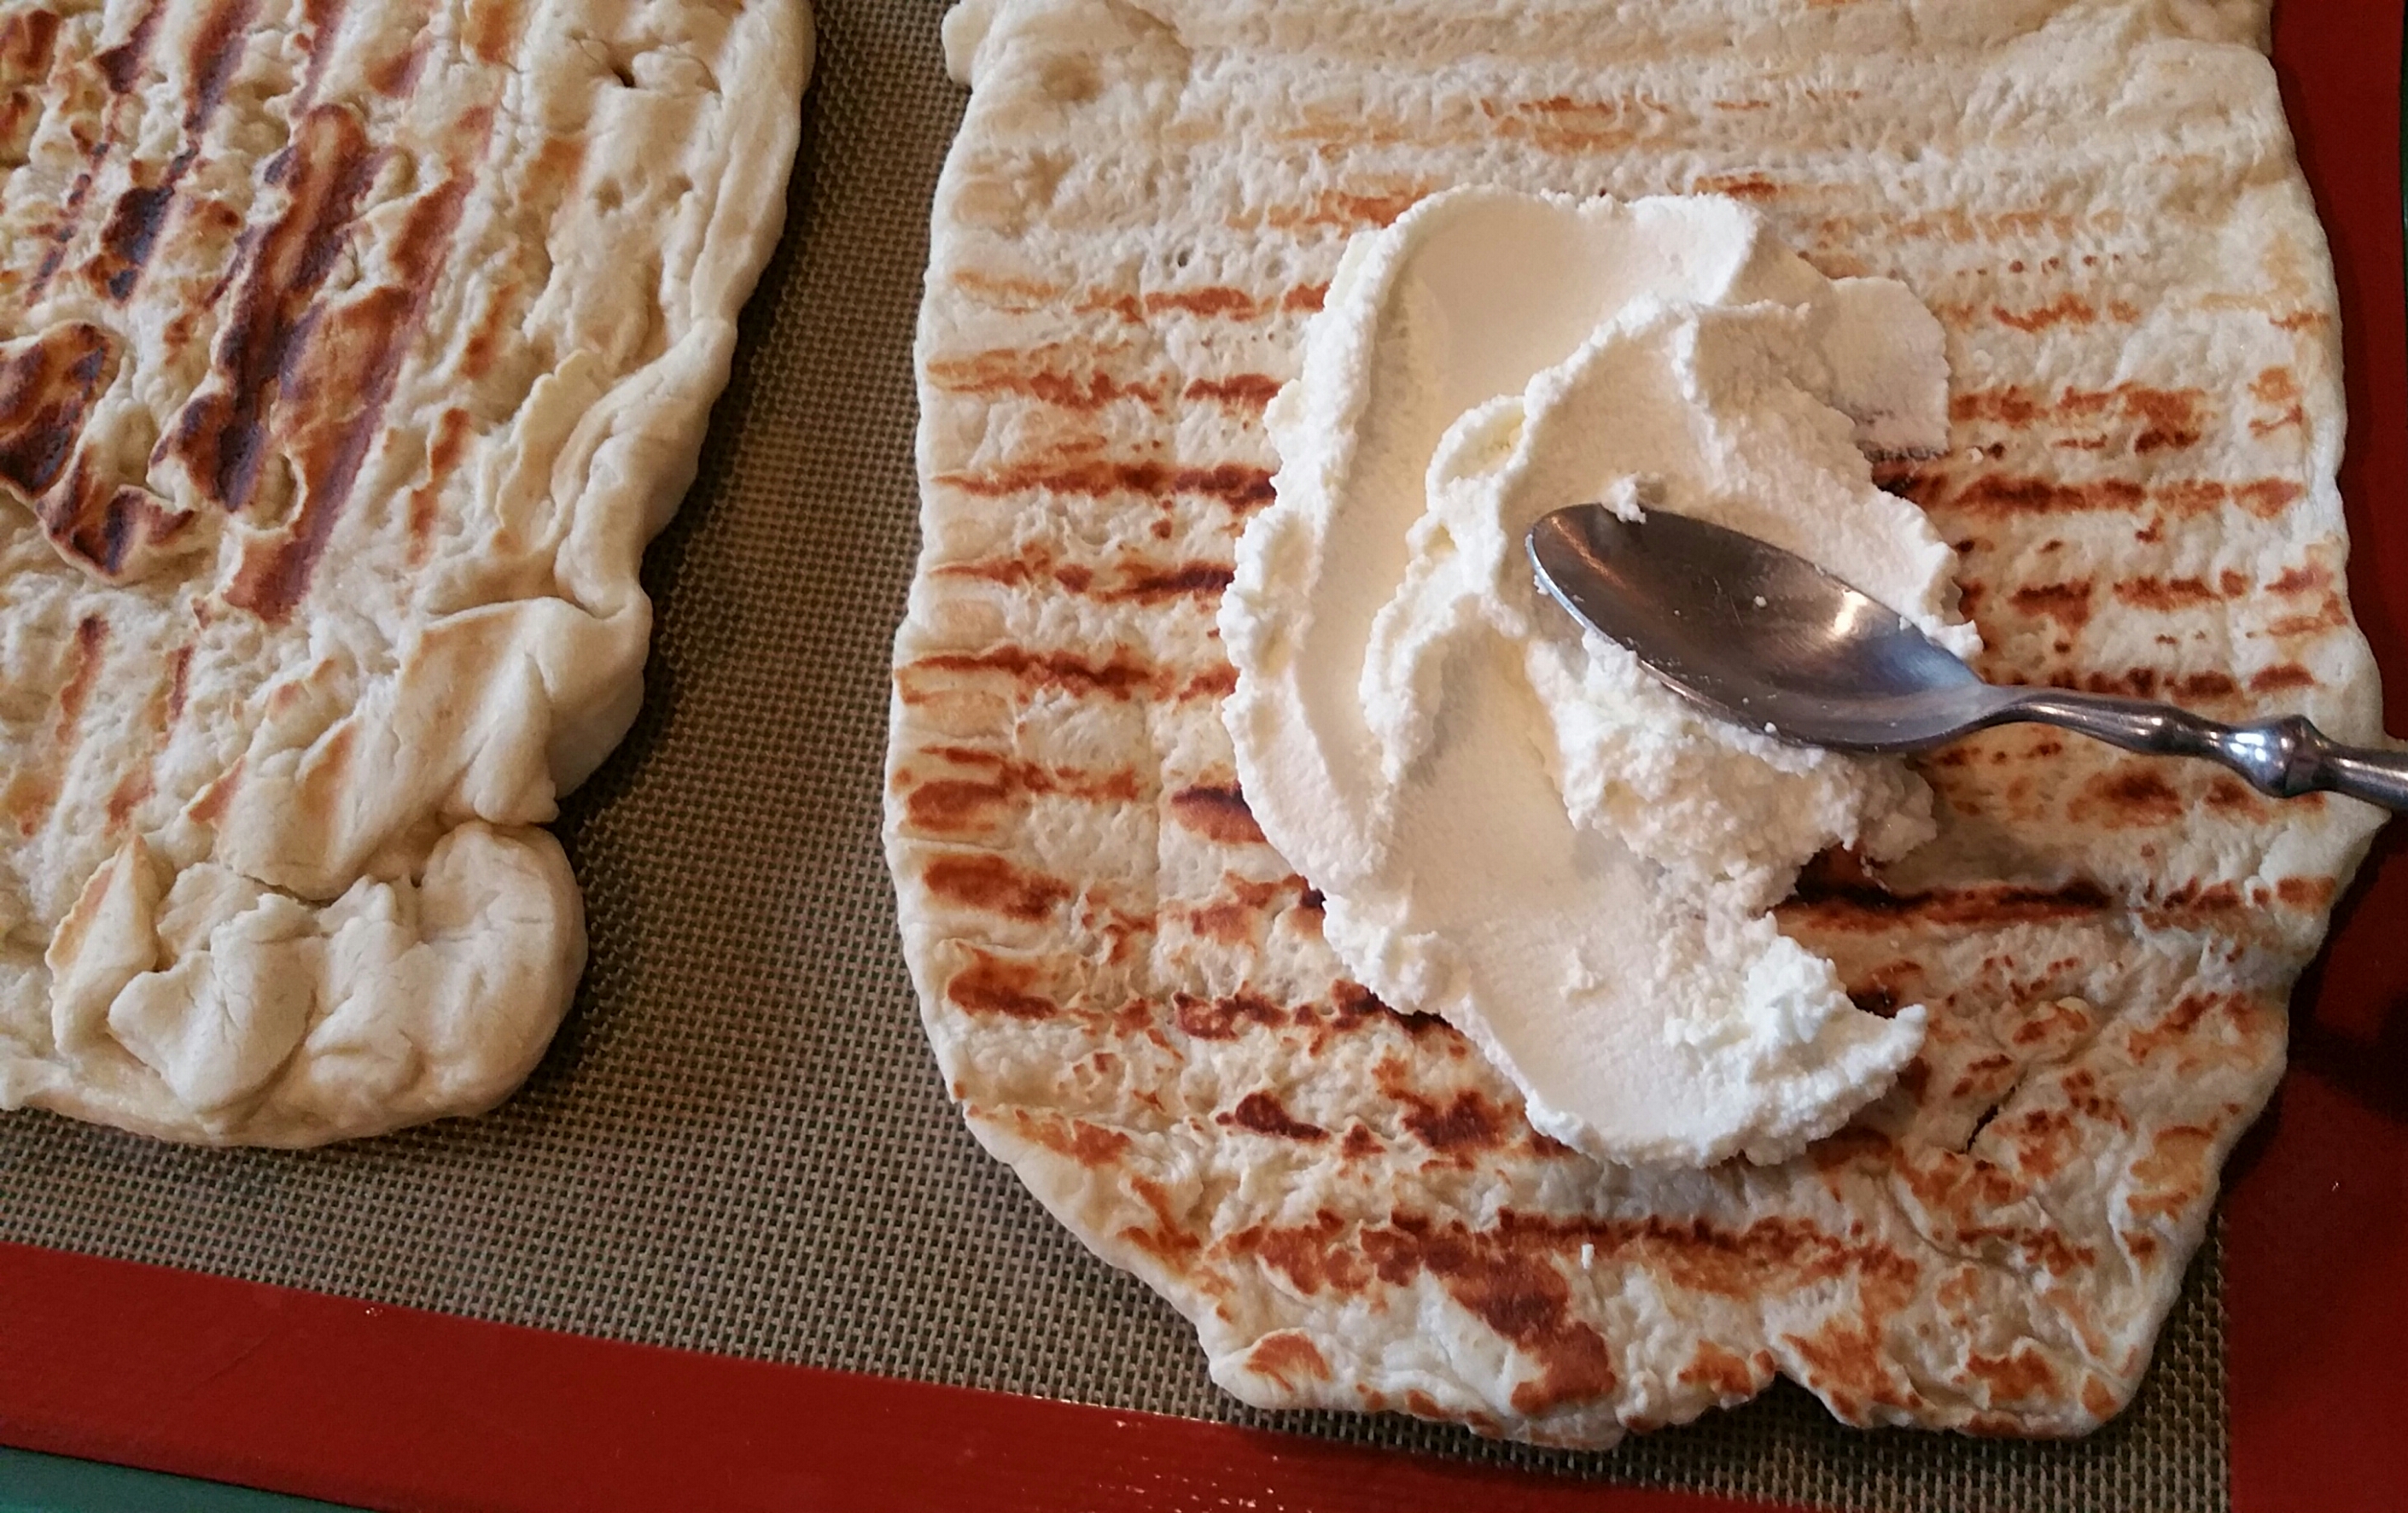
2.  Flatten and stretch each half of dough into 12″ oblong or rectangle. Lay one dough into bottom of hot grill pan and cook until it stiffens, 1 to 2 minutes, flip and cook 1 to 2 minutes more.  Repeat with remaining dough.
20150308_091541-2

3.  Transfer crusts to a baking sheet and spread ricotta on top.  Bake until ricotta melts slightly, about 6 minutes.
20150308_091711-2

4.  Remove from oven and top with arugula, grapes, pine nuts and lemon zest.   Cut into squares and serve warm.20150308_092703

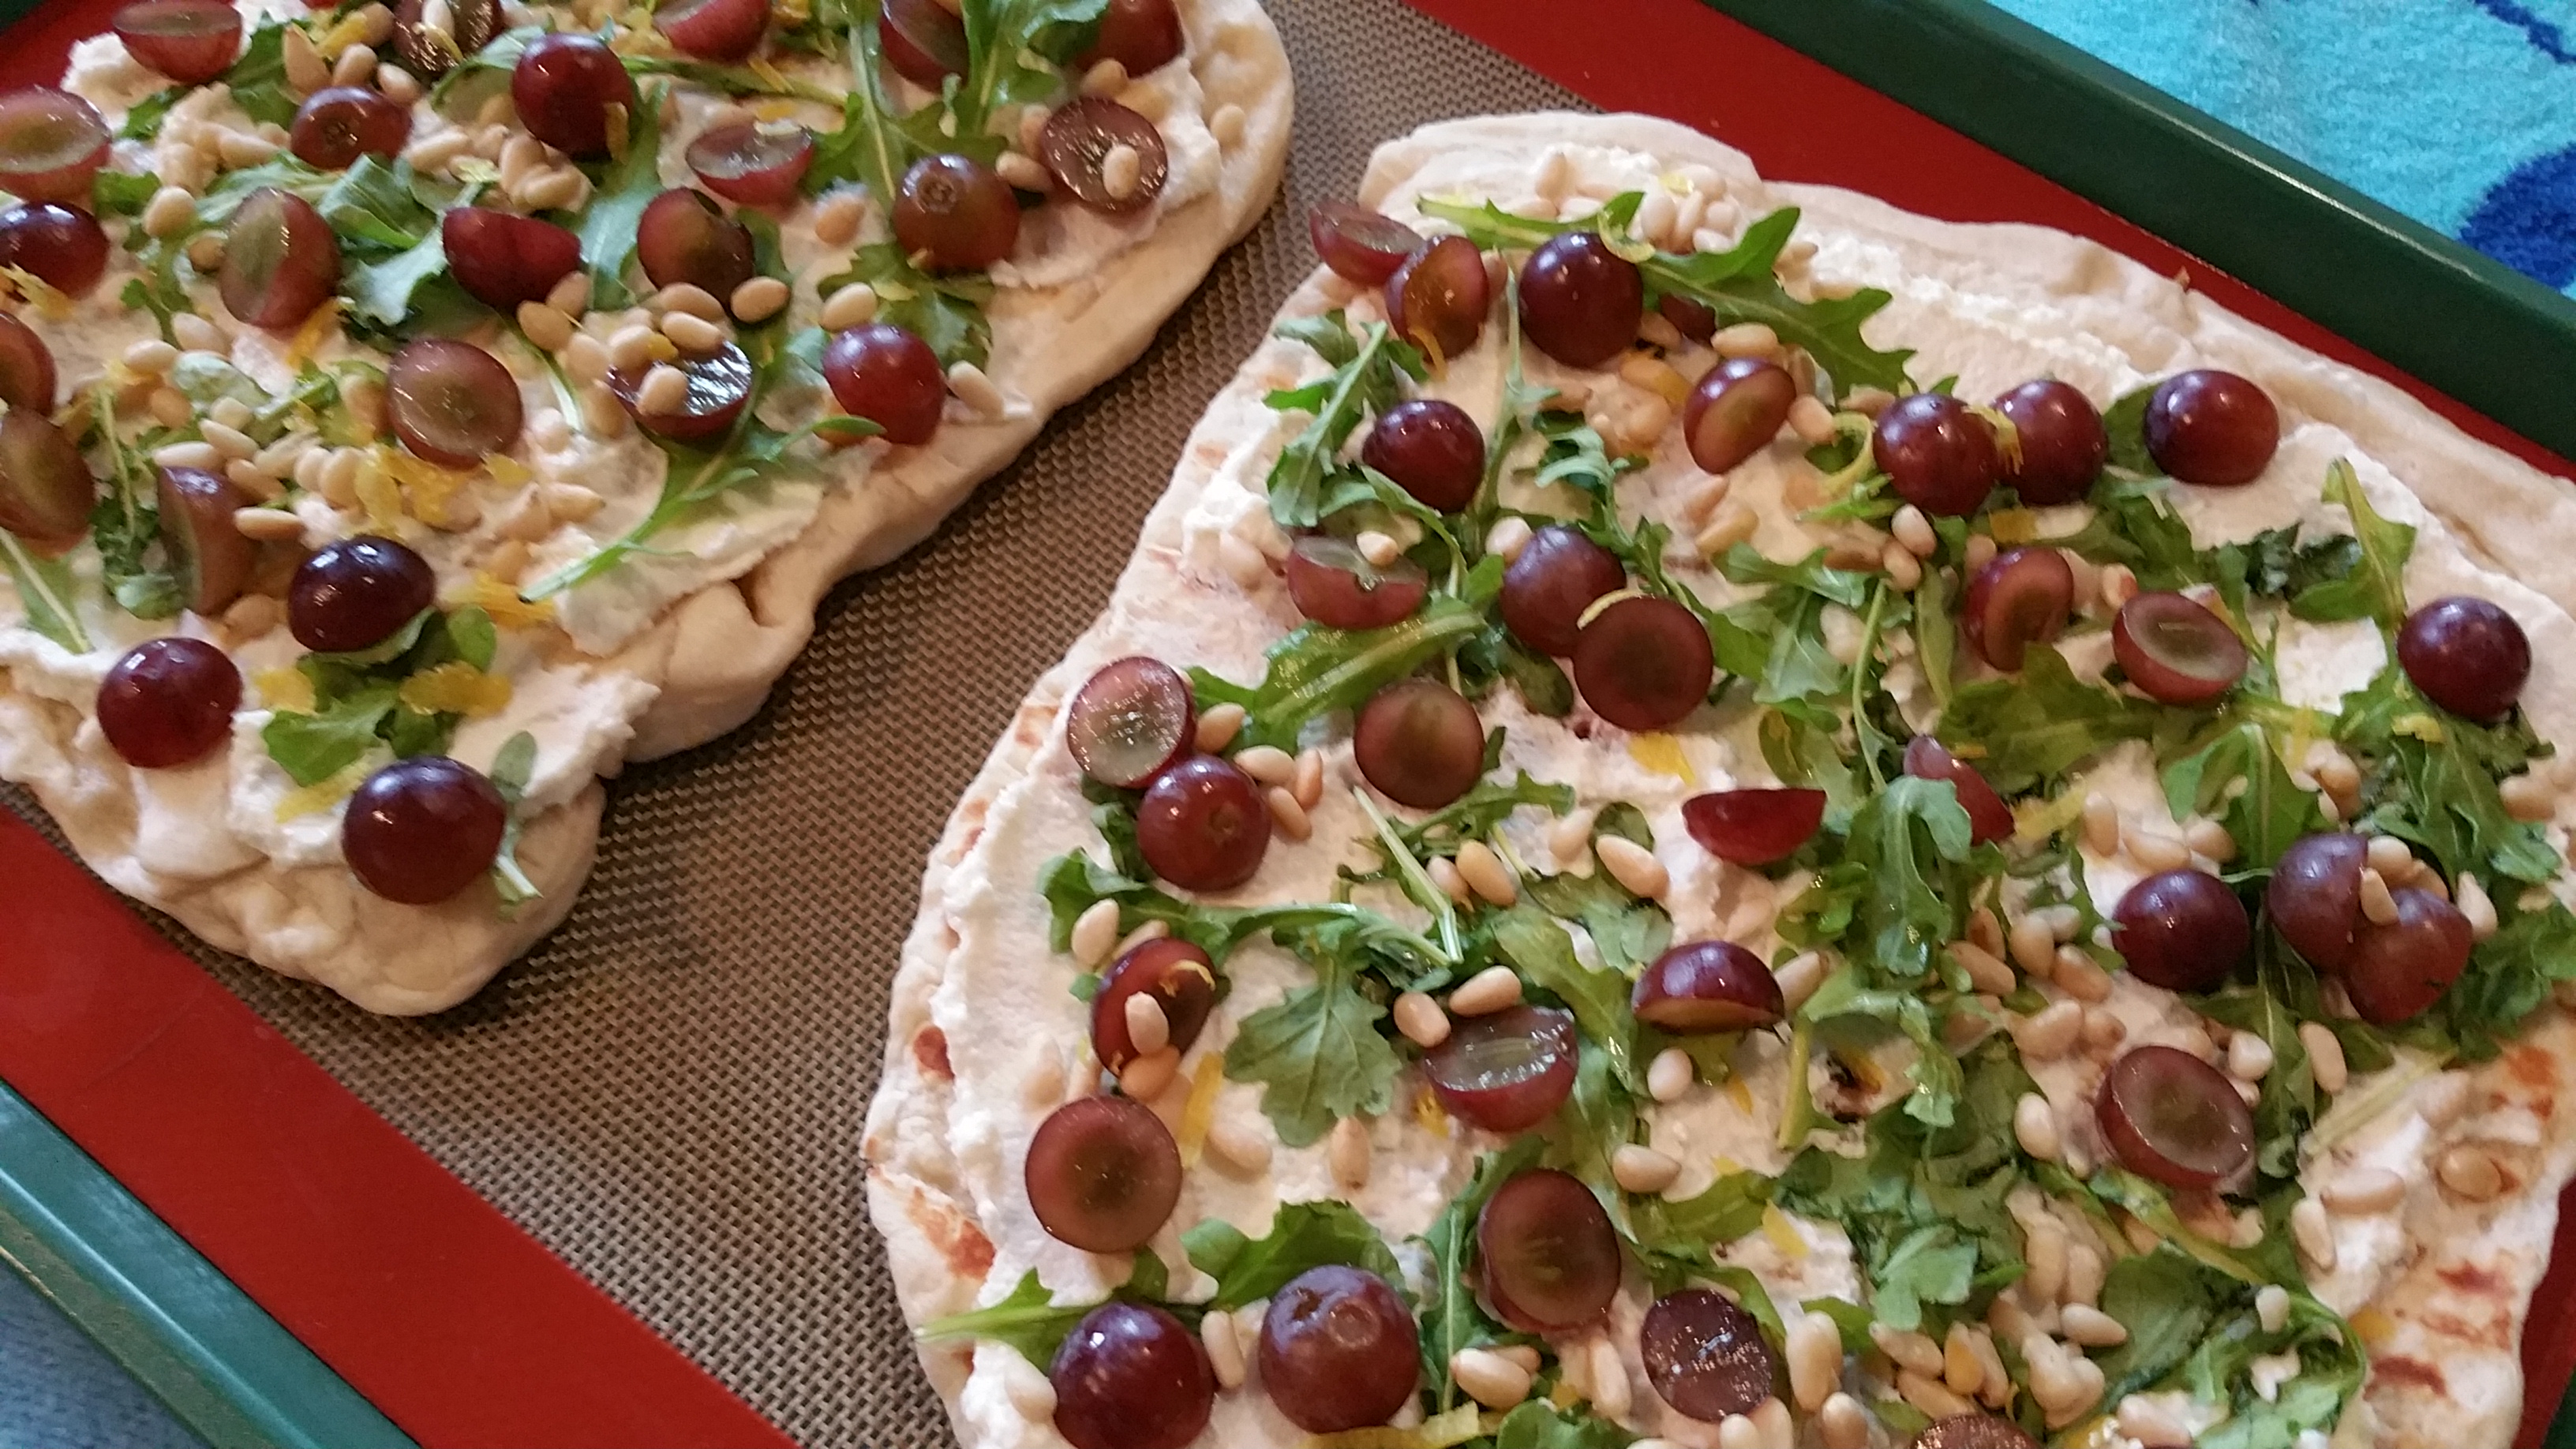
Confession: The first time I made this, I didn’t read the directions carefully and put the toppings on before baking the crust instead of after. The second batch was made following the instructions. Turns out I liked it better with the toppings cooked, especially the pine nuts, but it is good either way.

Print-friendly recipe:  Pizza with Arugula, Ricotta and Red Grapes

Enjoy this and many more easy brunch recipes to come.

Cheesy Onion & Bacon Monkey Bread


20150301_120546-1


Bacon-anything is a sure hit, but this cheesy bacon monkey bread is sensational.


There are many recipes online for bacon monkey bread, and I tried a few different approaches to see which I like best.  By far my favorite is the recipe found in Christmas With Southern Living (there’s an Amazon link to the book below).   I’ll give you the step-by-step instructions and then explain the variations I tried.

Ingredients:
5 tablespoons butter
2 sweet onions, sliced thinly
1 32-oz package frozen bread dough, thawed
1 pound bacon, cooked and crumbled
2 cups shredded Gruyère cheese

1.  Sauté onions over medium heat in 2 tablespoons of butter, stirring often, until onions are a caramel color, about 15 minutes.Chopped onions    03 Grilled Onions

2.  Roll dough into balls the size of large marbles.

3.  Sprinkle ½ cup of bacon and ½ cup of cheese in the bottom of a buttered bundt pan.  Arrange one-third of the dough balls over the cheese and brush with melted butter.  Layer half the onions, ½ cup of bacon and ½ cup of cheese.  Continue layering with the dough balls, onions, bacon and cheese.
20150301_085556    20150301_090600

4.  Cover and let rise in a warm place (80 to 85 degrees) for an hour to an hour and a half or until doubled in bulk.  (I left it too long so mine is a little “over the top.”)
20150301_091804-1   20150301_112757-1

5. Bake at 350 degrees for 35 minutes or until top is golden brown.  Cool in pan on a wire rack 10 minutes; carefully invert bread onto a serving platter.  Serve warm.

20150301_122004-1


VARIATIONS:

The other recipe for this that I like is found on www.dinnerordessert.com.  This recipe called for using refrigerated pizza dough instead of frozen bread dough and stuffed the bacon, cheese and onions inside each dough ball.06 Stuffing

07Stuffed    08 Ball

It also uses Rosemary Butter — just sauté garlic in butter for 2-3 minutes and then stir in rosemary for 1 minute.  Yummy!04 Rosemary Butter    05 Buttered Pan

Here’s how the finished product looks with the goodies tucked inside:
11 Baked     12 Bite  

Print-friendly recipe:  Cheesy Bacon & Onion Monkey Bread

Enjoy this along with many of the easy brunch recipes to come.


Strawberry Icebox Cake

Strawberry topping of cake Icebox cakes are made from a variety of cookies and cream that, when refrigerated, meld into a cake-like texture. This cake is simply layers of graham crackers, whipped cream and strawberries.  A
drizzle of melted chocolate can increase the wow factor. 20141224_231218

The amount of ingredients depends on how tall you choose to build this dessert.  For a 9″x13″ cake pan, you’ll want to use 3 cups of whipping cream and 2 sleeves of graham crackers.  When stacking it 5Ingredients or 6 layers high, it takes about 4 cups whipping cream and 3 sleeves graham crackers.  A basket of strawberries is probably enough for the cake pan, but I used most of a double basket to build my tall cake.  The only other ingredients are a little powdered sugar and vanilla to make the cream sweet and some chocolate to melt and drizzle if you like.

The simplest way to core a strawberry while maintaining it’s shape is to insert a plastic straw from the point of the strawberry to the stem.  Then grasp the stem and pull to remove the core from the straw.
Straw

As you’re slicing the strawberries, select a couple of the prettiest ones to use as a garnish and save some bright end slices for the top layer.
Pretty strawberries

Using an electric mixer on high speed, whip 3 or 4 cups of heavy whipping cream until stiff peaks form (keeps it’s shape).  Then add one-third to one-half cup powdered sugar and 1 teaspoon or so of vanilla and whip until combined.
Whipped Cream

Spread a small layer of whipped cream on the tray or bottom of pan to keep the graham crackers from sliding.  Then alternate layers of graham crackers, whipped cream and strawberries until they are as high as you like.
First layer    Graham Cracker on top

There are many ways to melt chocolate for drizzling, but by far the simplest way I know is using Candy Melts and disposable icing bags from Wilton (Amazon link at bottom of this page).Chocolate Melts

Just put as many or few disks as you like in an icing bag, microwave it 15 seconds at a time and massage the bag with your fingers until the chocolate is melted and smooth.  Then snip a tiny opening at the tip with a pair of scissors and squeeze the bag as you wave it back and forth above the cake.
Icing Bag    Icing the Cake

Refrigerate at least eight hours and prepare yourself for the oohs and ahs you’ll get from your guests.

TIP:  This cake is extremely hard to slice neatly the first day (but still yummy).  If you make it two days ahead and keep in the fridge, it will be much more cake-like and easier to slice.

Enjoy this along with many of the easy brunch recipes to come.

Printable recipe:  Strawberry Icebox Cake

Crudités Art & Roasted Red Pepper Dip

Crudites

Absolutely simple yet so impressive!

You can see that I simply sliced some carrots, cucumber, radishes, celery and green onions, but instead of loading them on a platter around a bowl of dip, I arranged them into a picture.

You could use pretty much any type of veggie to create any scene you want.  One warning though: I had a terrible time getting my guests to eat any because they didn’t want to disturb the picture.

Roasted Red Pepper Dip 2For the dip, I served roasted red pepper dip.  So easy and yummy.  Finely chop 1/2 cup of almonds and one clove of garlic.  Add 1 cup of roasted red peppers from a jar, drained, 2 teaspoons red wine vinegar and 2 tablespoons olive oil.  Whisk together and chill.

Roasted Red Pepper Dip

There you have it … and very simple yet impressive tray of veggies and dip.

Crudites and dip

Printable recipe:  Roasted Red Pepper Dip

Enjoy this along with many of the easy brunch recipes to come.

Baked Oatmeal

DoneThis is an amazing recipe for baked oatmeal.  Not only is it easy and delicious, but it is incredibly healthy (just don’t tell your family that part) with quinoa, steel cut oats, bananas, blueberries, raspberries and even protein powder.

Of course, we think of oatmeal as a breakfast food, but this recipe is so yummy you can top it with a scoop of vanilla ice cream for a very tasty dessert.  For my brunch I served it with Slow Cooker Applesauce, Greek yogurt, nuts and pomegranate seeds.

There are twelve ingredients, but please don’t let that dissuade you.  It’s still quite simple to prepare.  And this recipe makes 18 servings (or cut in half and use a smaller baking dish).
ingredients

1.  Rinse the quinoa and steel cut oats (1 cup each) until the water runs clear.  Drain well.
Rinsing

TIP:  Use the right tool for the job.  I grabbed my go-to colander (the green one) but the holes were too big and the first splash of water sent quinoa and oats racing down the drain.
Collanders

2.  Prepare the fruit:  3 or 4 bananas, sliced; 2 cups blueberries (fresh or frozen); and 1 cup raspberries (frozen might be fine, but I prefer fresh ones because they are plumper and hold their shape better.)

3.  Layer half the fruit in a large baking dish prepared with cooking spray.
Layer of fruit

4. Cover with the quinoa and oats.
Layer of grain

5.  Layer the remaining fruit.
Layer of fruit 2

6.  In a large mixing bowl, whisk together 4 cups of your favorite milk (dairy, almond, soy, etc.), 4 eggs, 2 scoops of your favorite protein powder, 2 teaspoons vanilla, 1 teaspoon cinnamon, and a dash of salt.
Whisk

7.   Pour the liquid over the fruit and grain.
TIP:  To prevent the fruit from floating or migrating unevenly, pour the liquid very slowly from one corner of the dish.
pouring  Pouring 3

8.  Sprinkle half a cup of coconut flakes over the top.
Coconut added
TIP:  If you like, toast the coconut first in a 375 degree oven,
but watch it very carefully.  The first minute looks like no change is happening and suddenly it turns brown very quickly.
Coconut with large minutes

9.  Bake at 375 degrees until nicely browned and dry on top, about an hour to an hour and fifteen minutes.

10.  Let sit for one hour before serving — that’s the only hard part because it smells sooooo good!
Done

Enjoy!


IMPORTANT NOTE:  While quinoa is very healthy for us, many people have not embraced the texture.  If you and your family or guests are not quinoa fans, you may be happier preparing this recipe with just oatmeal and no quinoa.

Enjoy this along with many of the easy brunch recipes to come.

Print recipe:  Baked Oatmeal Recipe

Slow Cooker Applesauce

Applesauce final

Talk about simple AND impressive.  I love this easy brunch recipe.  It takes only five minutes of work and adds so much to oatmeal, pork chops, a Thanksgiving dinner, oh, oh! and ice cream!! OOoohoohooo!  Excuse me for a minute.

Okay, I’m back.  Yes, definitely tops ice cream well.

Most any type of apple can be used for applesauce.  I used Braeburn this time; Pink Lady last time.  Equally yummy.  Or you can try a mix of apples to find your perfect flavor combination.

And lookie, lookie!  I finally peeled an apple in one strip without it breaking!  Woo hoo!
Applesauce peel

Peel and core four apples and cut each apple into four pieces.

Put all ingredients in a slow cooker — apples, ¼ cup packed brown sugar (or 3 tablespoons granulated sugar), ¼ teaspoon ground cinnamon, ⅛ teaspoon ground nutmeg, and ¼ cup water.  (You may want to add less sugar, but don’t ask me to.)
Applesauce ingredients  Applesauce combined ingredients

Cover slow cooker with lid and cook on high until tender, about an hour and a half.
Applesauce in crock pot

Use a potato masher or whisk for chunky applesauce or puree for a smoother texture.

Mmm MMM! Enjoy.

Applesauce final

For a print-friendly version:  Slow Cooker Applesauce Recipe


Bacon-Wrapped Stuffed Dates

 Bacon dates “Life is too short
not to order the
bacon dessert.”
– George Takei

You’ll never go wrong serving bacon at a brunch, but this appetizer is my absolute favorite bacon recipe.  It’s the perfect blend of
savory/sweet, crispy/chewy and creamy/crunchy with bacon, cream cheese, almonds and dates in every bite.

  1. You’ll save time by getting pitted dates (“pitted” means the pits have already been removed), but in case they aren’t available, no worries.  It’s actually quite simple to remove the pits.  Start by removing the hard, round tip if still attached.  Slice the date from end to end and open it carefully.  Discard the pit.
    20150117_123230-1-1     20150117_122328-1
  2. Preheat oven to 400 degrees F.
  3. Coat baking dish with cooking spray.
  4. Spread a dollop of cream cheese inside the date.
    20150117_122855-1
  5. Put an almond in the center and close the date around it.
    20150117_122635-1
  6. Roll up the stuffed date in a half or third of a strip of bacon and secure with a toothpick.
    20150117_123031-120150117_122022-1
  7. Arrange wrapped dates seam side down and a half-inch apart in a shallow baking dish.
    20150117_123106-1    20150117_125054-1-1
  8. Bake until bacon is crisp, about 10 to 15 minutes.
  9. Drain on a paper towel or parchment paper and then transfer to serving platter.

 20150119_093631 

Enjoy this along with many of the easy brunch recipes to come.

Printable version: Bacon-Wrapped Stuffed Dates

Pomegranate Juice

20150124_161303-1

True confession:  I have a long history of a passive-aggressive relationship with fruit.  I get it with the best of intentions to eat it because I know it’s good for me.   I buy different types of fruit that I’ve never tried before in hopes of finding one I will actually enjoy.  But more often than not, it sits on my counter neglected to the point of having to be tossed onto the compost heap, leaving me feeling guilty and ashamed.  All I can say is it’s on a long list of things to discuss with a therapist.

So true to this pattern, I bought my first pomegranate a couple of weeks ago.  Day after day I would think about eating it.  It’s the thought that counts, right?  Today I realized that if I didn’t fix it soon, it would no longer be edible, so I got on the internet and watched several YouTube videos on how to deseed and juice a pomegranate. Then miraculously, I got myself into the kitchen and actually tried it myself.

OMG!!!!  So yummy.  So easy.  So quick.
How could I have waited so long to discover this wonderful fruit?!

To my great chagrin, the three produce departments I called today all told me that pomegranate season is over and they will not be carrying any more until the fall.   Boo hoo!  (and yes, I realize what a charmed life I have if this is my worst problem)   According to Wikipedia, pomegranate season is from September through February, so I’ll keep checking with other markets to hopefully find some pomegranates to use for my Valentine’s brunch in February.

I only took this one picture today of the glass of juice I made along with a few seeds I left to snack on. When I am able to get more pomegranates, I will take pictures and update this post to include my step-by-step process.  In the meantime, here’s one of the YouTube videos I found helpful: https://www.youtube.com/watch?v=wDZ-ZYZsc2Y

Moral of the story:  Carpe frutus! Seize the fruit!

Enjoy this along with many of the easy brunch recipes to come.

Blanched Asparagus

20150110_213141-1-1

I was shocked to discover how SIMPLE it is to prepare asparagus.  Seriously, it’s so SIMPLE I feel a little silly posting about it, but hey, maybe some of you don’t know either.

1.  Trim asparagus.   Some people bend the spears until they naturally snap.  I just slice them to the same length to fit my serving platter.
20150110_210131-1

2.  Rinse the asparagus well and add to boiling water.
20150110_210822-1

3.  For thin spears, boil only a minute or two.  Medium or thick spears may take two or three minutes, but do not overcook.

4.  Remove asparagus from boiling water and submerge it in cold or ice water to stop the cooking process.
20150110_210257-1

5.  Drain and refrigerate until completely chilled.

It’s that SIMPLE.  For a printable version, click Blanched Asparagus Recipe.

Kale & Roasted Sweet Potato Salad

salad narrow
I’ve never in my life wanted to ask
someone
for a salad recipe!” – Laura K.

The evening before my first brunch, it occurred to me that the only items on the menu my two gluten-free friends would be able to eat were the steamed asparagus and fresh strawberries.  I searched online for a recipe that would use ingredients I already had on hand and found a recipe for a kale salad that had roasted vegetables and lentils.  Yum.

Turned out I didn’t have any lentils on hand (okay, actually I did, but my pantry was so disorganized that I didn’t find them until a few days later <heavy sigh>), but what I did find was a packet of Seeds of Change Quinoa & Brown Rice.  I had bought a case at Costco some time back.  It makes a delicious meal all on its own and only takes
90 seconds in the microwave (now that’s MY idea of cooking dinner after a long day at work).  Tell you what, it was the perfect ingredient for my kale salad.  Time to get another case.

Here’s a link to print the recipe for Kale & Roasted Sweet Potato Salad, and below is a step-by-step description of how I made it.  I recommend this salad for any meal.  Delish!

  1. Preheat oven to 400 degrees F.
  2. Peel and cube a large sweet potato.  You can use any kind, but I prefer the jewel sweet potato because its color and flavor are yam-like but it has the high fiber of a sweet potato.
    Sweet Potato
  3. Chop a red onion into large wedges.Onion
  4. Toss the sweet potato and onion with 2 tablespoons of olive oil. I find it easiest to put the vegetables and oil in a plastic bag and kneed the veggies to coat evenly.
    Baggie
  5. Spread the vegetables on a baking sheet covered with foil and season to taste.   My seasoning of choice for probably half of everything I cook is McCormick’s Garlic Pepper.  That’s all I used on these veggies and I can’t imagine them tasting any better.
    Ready for oven
  6. Roast for approximately 40 minutes until veggies are tender and edges are nicely browned.
    roasted veggies
  7. Remove and discard the tough kale stems and slice the curly leaves into bite-sized pieces.
    kale to cut  kale and stems
  8. Add two tablespoons olive oil and one finely minced clove of garlic to a saucepan over medium high heat.  Sauté until garlic is tender and slightly browned, about two minutes.
    garlic in oil
  9. Add the kale and cook until it is wilted but still slightly crunchy, about five minutes.
    kale cooking
  10. Tear open a packet of Seeds of Change Quinoa & Brown Rice and microwave for 90 seconds.  Pour contents over kale.
    Seeds of Change  kale with rice
  11. Combine roasted veggies, kale and quinoa and brown rice. Serve warm or chilled.
    salad close up